
Plywood is one of the most widely used materials in both professional and DIY projects due to its strength, flexibility, and affordability. Whether you’re making furniture, building structures, or creating decorative elements, plywood can be the perfect material for the job. However, one common question that often arises in woodworking circles is, «Can you stain plywood?» The short answer is yes — but with a few important caveats.
Plywood, as a material, has a layered structure that makes it a bit more complex when it comes to staining. It’s not as simple as applying stain to a solid wood surface, which can absorb the stain evenly and predictably. In this article, we’ll explore in great detail whether staining plywood is a good option, how to do it correctly, and how to avoid common pitfalls. By the end, you’ll know everything you need to ensure that your plywood project turns out exactly as you envisioned.
What Is Plywood?
The Basics of Plywood
Plywood is a type of engineered wood made by gluing together multiple thin layers, or veneers, of wood in a cross-grain pattern. This structure not only provides strength and stability but also allows for more affordable production compared to solid wood. The layers are typically bound together with strong adhesives, making plywood less likely to warp or shrink than solid wood.
The key to understanding plywood lies in recognizing its layered composition. Each layer (also called a ply) is placed at a right angle to the adjacent layer, which helps minimize the expansion and contraction of the wood. This multi-layered structure is precisely what gives plywood its inherent strength and durability, but it also plays a significant role in how the material behaves when you try to apply a stain.
Types of Plywood and Their Impact on Staining
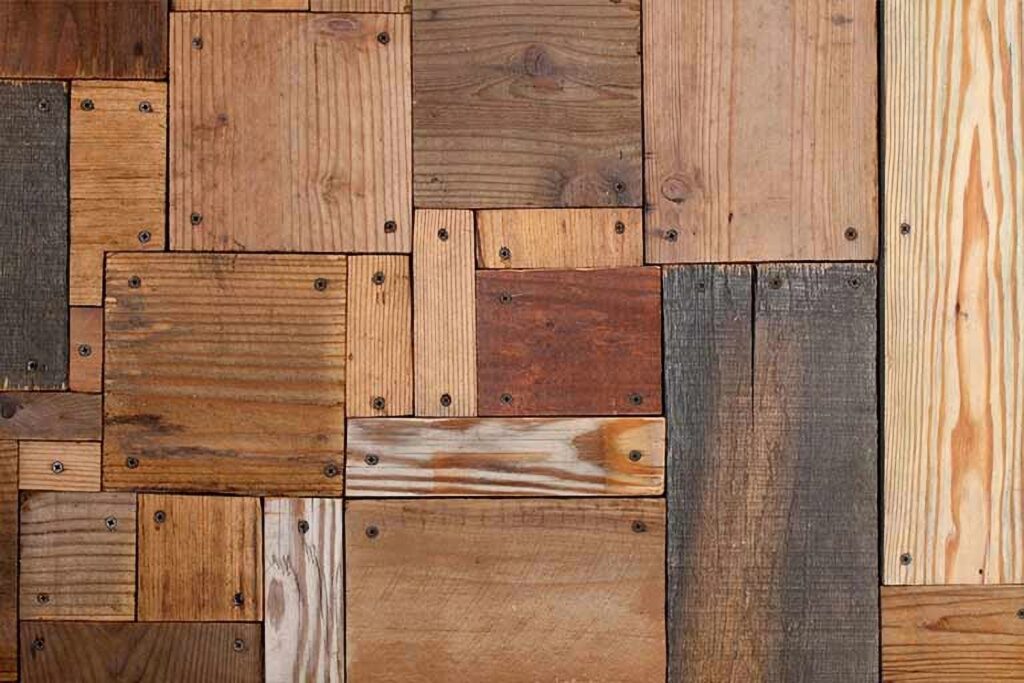
Not all plywood is created equal, and the type of plywood you use will impact how it reacts to staining. Plywood comes in different grades and can be made from various types of wood, such as softwoods (e.g., pine, fir, or spruce) or hardwoods (e.g., birch, oak, or maple). Each type of plywood has its own unique characteristics, especially when it comes to how well it takes a stain.
- Softwood Plywood: Softwood plywood tends to have a more porous texture, which makes it easier for the stain to penetrate the surface. Stains typically absorb more evenly on softwood plywood, although it still requires proper preparation to avoid blotchiness.
- Hardwood Plywood: Hardwoods have denser fibers, which can make the staining process more challenging. Hardwood plywood often has a smoother surface, but its denser makeup can sometimes prevent the stain from absorbing as evenly, leading to uneven or blotchy finishes.
- Marine Plywood: Marine plywood, which is designed for use in boats or wet environments, is usually made from higher-quality veneers and is treated to resist moisture. While staining marine plywood is possible, you may want to take extra care to use waterproof or moisture-resistant finishes.
The veneer layer is also an important consideration. Thin veneers, while cost-effective, may not absorb stain evenly, whereas thicker veneers are more forgiving but can be more expensive.
Can You Stain Plywood?
The burning question for many DIY enthusiasts and professionals alike: «Can you stain plywood?» The answer is a resounding yes, but the process comes with specific challenges that need to be addressed for the best results. Let’s explore why staining plywood isn’t as straightforward as staining solid wood.
Why is Staining Plywood Tricky?
Plywood is made up of multiple layers of wood veneer, each of which can absorb stain differently. This means that achieving an even color across the entire surface can be difficult. Some areas may absorb more stain than others, leading to blotchiness or uneven pigmentation.
Another reason staining plywood is tricky is the veneer layer. While the outer veneer of plywood may look like solid wood, it is often thinner and smoother, making it more susceptible to uneven absorption of stain. The inner layers of plywood may absorb stain more readily, but their appearance is not as visible once the veneer layer is stained.
To answer the question directly: yes, you can stain plywood, but be prepared to put extra effort into preparation and application to achieve the desired result.
Factors That Affect Staining Plywood
When attempting to stain plywood, several factors can influence the outcome. These factors include the type of wood, the preparation process, the quality of the plywood, and the type of stain you use. Here’s a closer look at each of these variables.
Wood Type
As mentioned earlier, the type of wood used in plywood can impact how well it absorbs stain. Softwood plywood tends to absorb stain more evenly due to its porous nature, while hardwood plywood can be more challenging because of its density. If you’re wondering, “Can I stain plywood made from hardwood?” the answer is still yes — but expect a more intricate process. Hardwood plywood may require additional techniques, such as applying a pre-stain conditioner, to prevent uneven absorption.
Surface Preparation
Proper surface preparation is one of the most critical steps when it comes to staining plywood. Without sanding and cleaning, the surface may not accept the stain properly, leading to blotchiness, streaks, or uneven color.
Start by sanding the plywood with medium-grit sandpaper to remove any rough patches or imperfections. Then, finish off with fine-grit sandpaper to achieve a smooth, even surface. It’s essential to follow the grain of the wood while sanding to avoid creating visible scratches.
After sanding, wipe down the plywood with a damp cloth to remove any dust, oils, or debris. Dust can affect the stain’s absorption, and oils can create an uneven surface. For best results, consider using a tack cloth to capture any fine particles left behind.
Plywood Quality
The quality of the plywood can also make a big difference in the staining process. Lower-quality plywood tends to have more voids, knots, or defects in the veneer, which can lead to an uneven stain absorption. On the other hand, higher-quality plywood with a thicker veneer layer is more likely to absorb the stain evenly, creating a more consistent finish.
If you’re working with lower-quality plywood, you might encounter problems like grain reversal, where certain areas of the wood look significantly darker or lighter than others. To combat this, you can try using a wood conditioner or pre-stain conditioner, which helps create a more uniform surface for the stain to absorb.
Stain Type
The type of stain you use is just as important as the preparation and plywood quality. Different stains behave differently on plywood, and it’s crucial to choose the right one for the best results.
- Oil-Based Stains: These stains are the most common choice for plywood because they penetrate deeply into the wood and provide a rich, vibrant color. They tend to work well on both softwood and hardwood plywood, though you still need to pay attention to the absorption rate.
- Water-Based Stains: Water-based stains are quicker to dry and are often easier to clean up, but they can sometimes create uneven finishes on plywood. If you choose to use a water-based stain, make sure to apply it in thin, controlled layers.
- Gel Stains: Gel stains are thicker and more viscous than liquid stains, making them an excellent option for plywood. Gel stains tend to sit on top of the surface and provide more control over how the stain is absorbed, resulting in a more even application. Gel stains are especially beneficial for thinner veneer plywood, which can be prone to blotching with liquid stains.
How to Stain Plywood: A Step-by-Step Guide
Now that we’ve covered the essential factors that affect staining, let’s dive into the step-by-step process of staining plywood. With the right preparation and techniques, you can achieve a beautiful, professional-looking finish.
Materials Needed
Before you start, gather the following materials:
- Sandpaper (medium-grit and fine-grit)
- Stain (oil-based, water-based, or gel stain)
- Clean brushes or rags
- Wood conditioner (optional but recommended for softwood plywood)
- Paint tray or container
- Clear coat or polyurethane for sealing
- Gloves for protection
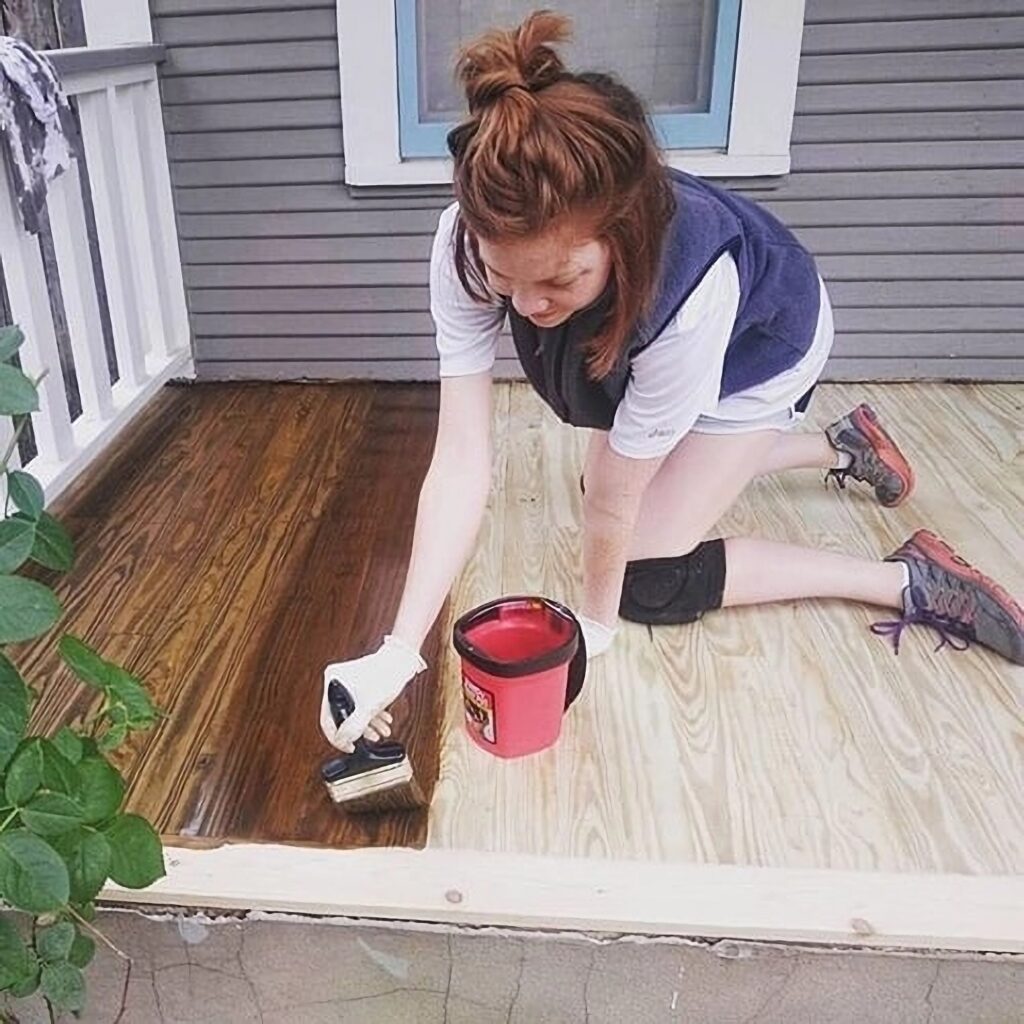
Step 1: Preparing the Plywood
Proper preparation is key to ensuring that the stain goes on evenly. Start by sanding the plywood with medium-grit sandpaper to remove any rough patches or imperfections. Afterward, use fine-grit sandpaper to smooth the surface further. Sand in the direction of the grain to avoid visible scratches.
Once you’ve sanded the plywood, thoroughly clean it to remove dust, dirt, and oils. You can use a damp cloth or a tack cloth for this. Ensure the plywood is dry before you proceed.
For softwood plywood, it’s a good idea to apply a pre-stain conditioner. This helps ensure that the stain is absorbed more evenly, which is especially important if you’re concerned about blotchiness.
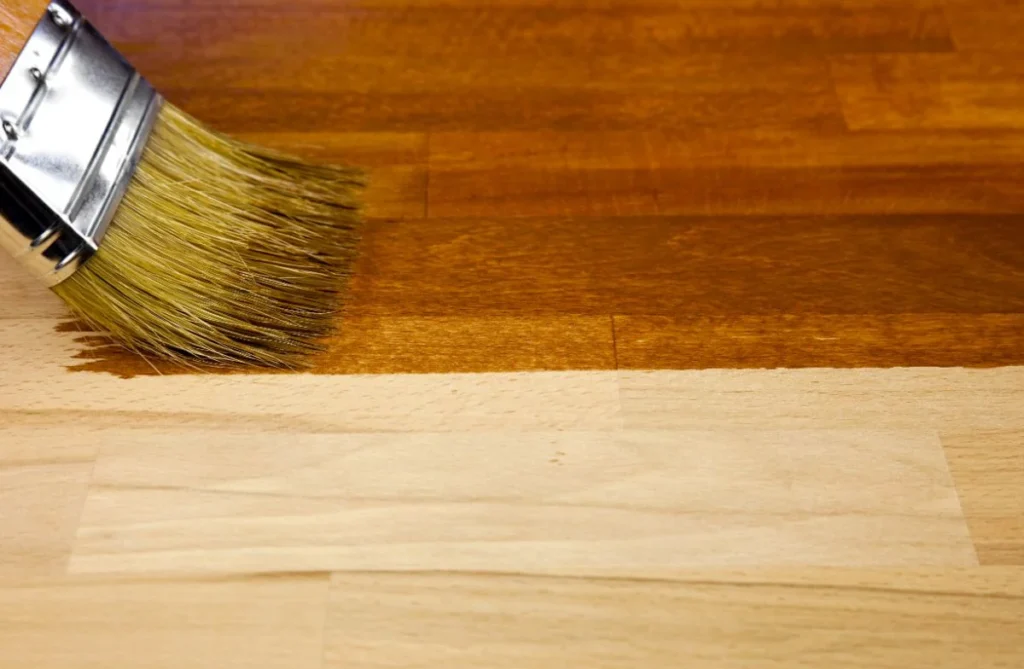
Step 2: Applying the Stain
Now that the plywood is prepared, it’s time to apply the stain. Start by using a brush or a clean rag to apply the stain to the plywood, working in the direction of the grain. Be sure to apply the stain evenly and avoid over-applying, as excess stain can lead to streaks or blotches.
If you’re using a liquid stain, be prepared to wipe away any excess with a clean rag before it dries. Gel stains are easier to control, but they still require even application to avoid uneven patches.
Allow the stain to dry completely before applying additional coats if necessary. Depending on the look you’re aiming for, you may need to apply multiple layers to achieve the desired depth of color.
Step 3: Sealing the Plywood
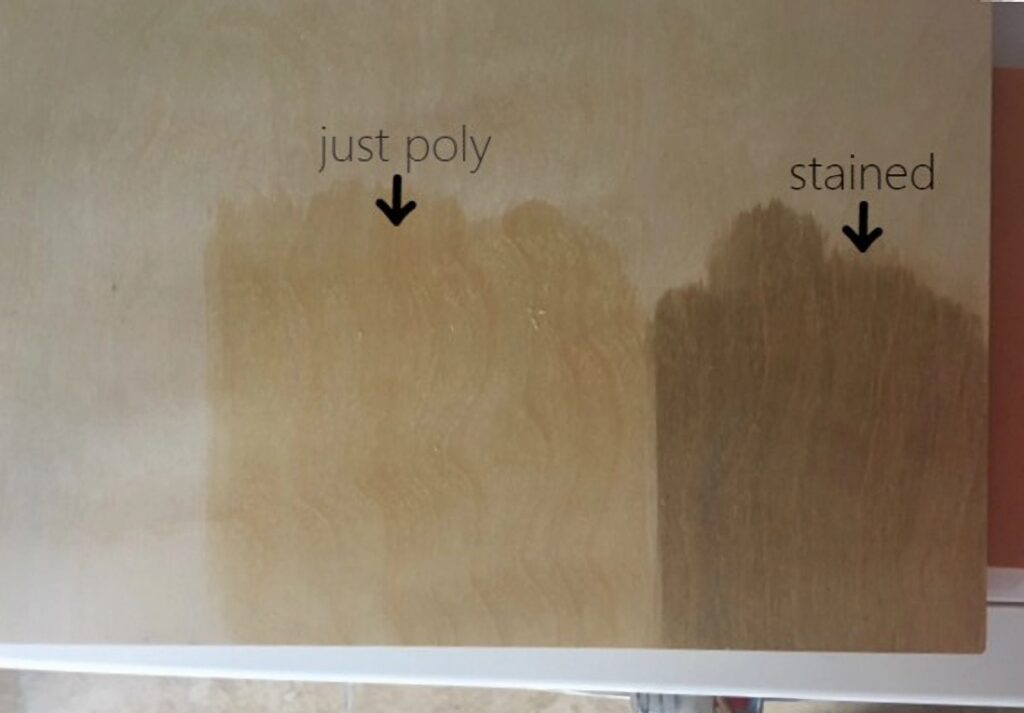
After the stain has dried completely, it’s essential to protect the surface with a clear coat or polyurethane. This will seal the stain and help protect it from wear and tear, moisture, and UV damage. Apply a thin coat of polyurethane and allow it to dry. You can add additional coats for increased protection.
Tips for Getting the Best Results
- Thin Layers: Always apply the stain in thin layers to prevent streaks and blotchiness.
- Pre-Stain Conditioner: If you’re concerned about blotchiness, use a pre-stain conditioner, particularly on softwood plywood.
- Gel Stains: Gel stains are more forgiving on plywood, especially if you’re dealing with thin veneer layers.
Common Mistakes to Avoid
There are several mistakes you should avoid to ensure your plywood staining project turns out well:
- Over-Sanding or Under-Sanding: Sanding is crucial, but excessive sanding can damage the veneer. Be gentle, and focus on getting the surface smooth.
- Applying Too Much Stain: Don’t over-apply stain. Apply in thin, even layers and wipe away any excess.
- Ignoring the Veneer: Always remember that plywood’s veneer layer is thinner and more delicate. Be extra careful when staining this surface.
Alternatives to Staining Plywood
If you’re unsure about staining plywood or if the result isn’t as desired, you have several alternatives:
- Painting: If you’re looking for a more uniform color or glossy finish, painting might be a better option.
- Wood Dyes: If you prefer a more translucent effect, wood dyes can offer a lighter, more natural look.
- Veneering: For a high-end look, you could apply a solid wood veneer to your plywood project, giving it a richer, more uniform appearance.
Care and Maintenance of Stained Plywood
Once your plywood is stained and sealed, you’ll want to maintain it to ensure its longevity. Regular cleaning with a soft cloth will prevent dust buildup, while occasional re-staining or refinishing may be necessary if the finish starts to wear over time.
Conclusion
To wrap up, yes, you can stain plywood, but it requires careful preparation, the right materials, and a bit of patience. By following the proper steps, you can achieve a beautiful, professional-looking finish. Whether you’re working on a small DIY project or a larger construction job, staining plywood can add elegance and character to your piece if done properly. Just be sure to pay attention to the type of plywood, surface preparation, and stain application for the best possible results. Happy staining!