
Plywood is a versatile and affordable material used in a wide range of projects, from furniture to flooring. However, while plywood is durable, it may not always have the visual appeal you desire. Painting plywood is an excellent way to enhance its aesthetic while adding durability and protection to its surface. If you’ve ever wondered how to paint plywood, you’re in the right place. This comprehensive guide will take you through every step of the painting process, from preparation to finishing touches, ensuring that your plywood projects look professional and stand the test of time.
Why Paint Plywood?
There are numerous reasons why painting plywood is a great choice for both aesthetic and functional purposes. Whether you’re building furniture, flooring, or cabinetry, adding a coat of paint to plywood can significantly enhance its appearance and lifespan. Let’s explore some of the top benefits of painting plywood:
Benefits of Painting Plywood: Protection, Aesthetics, and Durability
- Protection: Plywood, despite its sturdiness, can be vulnerable to environmental elements such as moisture, dirt, and wear. By painting plywood, you create a protective barrier that prevents these elements from damaging the wood. This is especially important in areas with high humidity, like kitchens and bathrooms, or on outdoor furniture.
- Aesthetics: Plywood has a distinct, natural wood grain that may not always fit with your design vision. By painting it, you can achieve a clean, uniform finish in any color or style, transforming an ordinary plywood surface into a beautiful addition to your space. Whether you choose bright, bold colors or more subdued tones, paint can completely change the appearance of your plywood.
- Durability: Painted plywood not only looks better, but it also lasts longer. The paint creates a durable surface that resists scratches, stains, and fading. This is especially beneficial for plywood used in high-traffic areas or on furniture that will undergo heavy use.
Common Applications of Painted Plywood
- Furniture: Plywood is commonly used for making furniture pieces like bookshelves, desks, and coffee tables. Painting the plywood can elevate these pieces from basic to stylish, providing a polished finish that complements your home décor.
- Flooring: Painted plywood can be an excellent alternative to more expensive flooring options. It’s often used in workshops, basements, and garages, but can also be used in more aesthetic settings like rustic homes or lofts.
- Walls and Ceilings: If you’re looking for a unique way to cover walls or ceilings, plywood is an ideal material. By painting it, you can create an industrial or contemporary look. Painted plywood walls are also easy to maintain, offering both beauty and practicality.
- Cabinetry: Many homeowners choose plywood for kitchen and bathroom cabinetry due to its affordability and durability. By painting the plywood, you can give your cabinetry a custom look without the high cost of solid wood cabinets.
Overview of the Process
Learning how to paint plywood involves a few key steps: preparing the surface, selecting the right paint and tools, applying the paint, and finishing with a protective coat. While the process may seem daunting, breaking it down into manageable steps makes it much more approachable. This guide will cover all of these aspects in detail to help you achieve the best results.
What is Plywood?
Before you dive into how to paint plywood, it’s important to understand the material you’re working with. Plywood is a sheet material made from thin layers of wood veneer that are glued together in alternating directions. This construction makes plywood strong and versatile, but it can also present certain challenges when it comes to painting.
You might be interested in this article: How to Remove Paint from Wood Cabinets
Types of Plywood and Their Impact on Painting
- Softwood Plywood: Typically made from woods like pine or fir, softwood plywood is commonly used for furniture, flooring, and general construction. Softwood plywood has a porous surface that can absorb paint unevenly, which means it often requires additional steps, like priming, to achieve a smooth finish.
- Hardwood Plywood: Hardwood plywood, such as oak, maple, or birch, is often used for higher-end furniture and cabinetry. While it’s denser and more durable than softwood plywood, it can also present challenges when painting due to its tightly packed grain. The key to painting hardwood plywood successfully is sanding and priming the surface well before applying paint.
- MDF (Medium Density Fiberboard): MDF is a type of engineered wood made from compressed wood fibers. It’s smoother than plywood and is often used for cabinetry and detailed furniture pieces. Because of its smooth surface, it’s easier to paint than plywood, but it can be more prone to moisture damage if not properly sealed.
Challenges of Painting Plywood
While plywood is a fantastic material for many projects, it does have some characteristics that can make painting tricky:
- Absorption: Plywood is highly porous, meaning it can absorb paint unevenly. This can lead to blotchy areas, where the paint sinks into the wood and dries in a patchy way.
- Visible Grain: The natural wood grain of plywood can show through the paint, especially if you don’t prepare the surface properly. Depending on your design, this may not be desirable, and you’ll need to take steps to minimize or conceal it.
- Surface Imperfections: Plywood can often have imperfections such as knots, holes, or rough edges. These need to be addressed before painting to ensure a smooth and even finish.
Preparing the Plywood Surface
The most important aspect of learning how to paint plywood successfully is preparation. A well-prepared surface will allow the paint to adhere better, look smoother, and last longer.
Cleaning the Surface
Before you begin painting, it’s essential to clean the plywood thoroughly. Dust, grease, or other contaminants can interfere with the adhesion of the paint. Use a vacuum cleaner to remove any loose dust or debris. Afterward, wipe the surface down with a cloth dampened with mild soap and water. If there are greasy spots, use a degreaser to remove them. Allow the plywood to dry completely before proceeding.
Sanding the Plywood
Sanding is crucial for preparing the surface of plywood before painting. It helps smooth out rough patches and allows the paint to adhere better. Start by using medium-grit sandpaper (around 120-grit) and sand the entire surface. Pay attention to areas where the plywood feels rough or uneven. A power sander can be a big help here, especially for larger surfaces.
How to Handle Rough Edges and Imperfections
If the plywood has rough edges or visible imperfections, use finer-grit sandpaper (220-grit) after the initial sanding. This will smooth out the surface and remove any lingering roughness. Sand the edges carefully to ensure they’re not sharp or splintered.
Filling Pores and Imperfections
Plywood often has small holes, cracks, or dents. To achieve a smooth, flawless finish, you’ll need to fill these imperfections. Use a wood filler that matches the color of the plywood and apply it to the affected areas using a putty knife. Smooth the filler so that it’s flush with the surface of the plywood. After the filler dries, sand the surface again to ensure it’s smooth and level with the rest of the wood.
Priming the Plywood
Priming is an essential step in how to paint plywood. Primer creates a sealed surface, preventing the paint from being absorbed too quickly and unevenly. Additionally, primer helps the paint to adhere better, resulting in a more durable finish. Choose a primer that suits the type of paint you plan to use—oil-based, water-based, or shellac-based.
Apply the primer using a brush, roller, or spray gun, depending on your preference and the size of the surface. Be sure to apply the primer evenly and allow it to dry thoroughly before moving on to the next step.
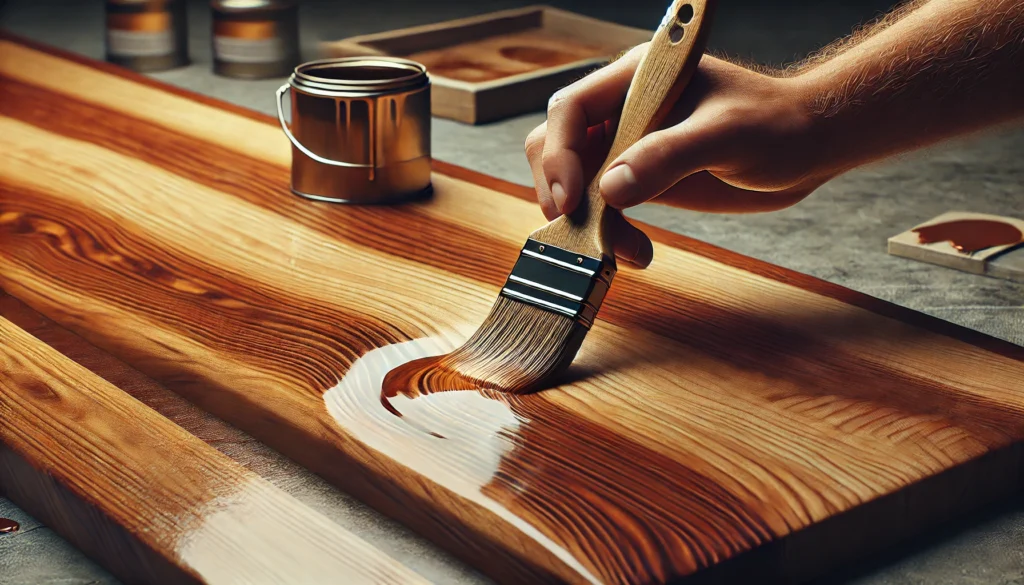
Choosing the Right Paint
Selecting the correct paint for your plywood project is vital for achieving the desired finish and durability. There are several types of paint to consider:
Types of Paint for Plywood
- Oil-Based Paints: These paints provide a strong, durable finish, making them ideal for high-traffic areas or furniture. However, they take longer to dry and have a strong odor, so proper ventilation is essential when using them.
- Water-Based Paints: Easier to work with than oil-based paints, water-based paints dry quickly, have less odor, and clean up easily with soap and water. They’re great for indoor projects, such as cabinetry and wall panels.
Best Paint Finishes for Plywood
For plywood, finishes like satin, semi-gloss, and gloss are typically the best choices. These finishes are more durable and easier to clean than matte finishes, which can show wear and tear over time. Choose the finish that best suits the look and use of your plywood project.
Tools for Painting
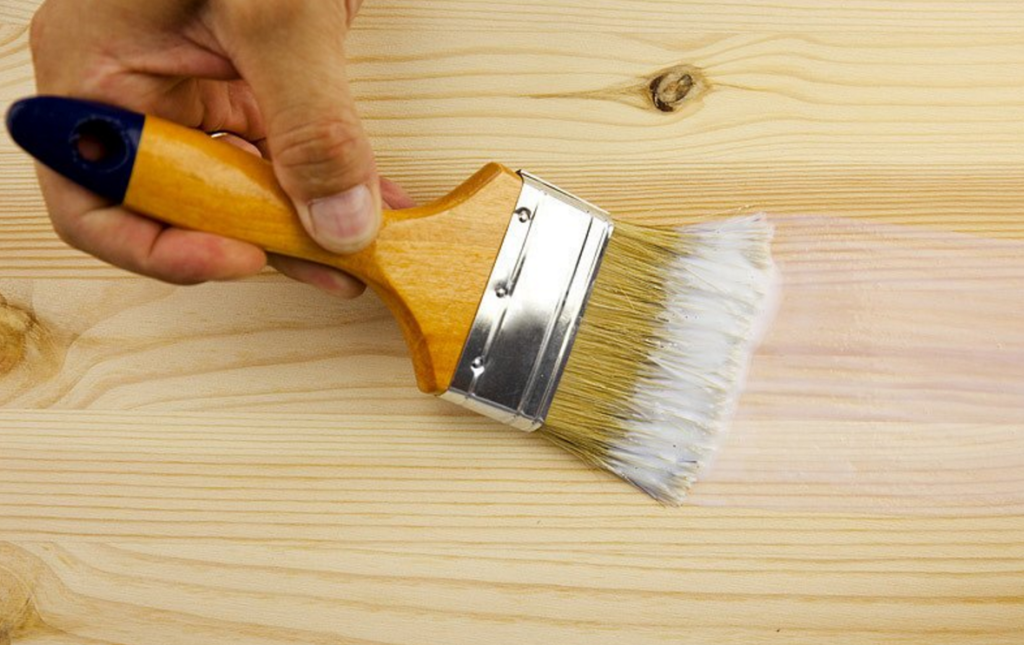
To ensure the best results when painting plywood, it’s important to use the right tools. For smaller projects or detailed areas, a quality brush is ideal. For larger flat surfaces, such as tabletops or panels, a roller is an efficient tool to use. If you’re looking for a smooth, flawless finish, a paint sprayer is an excellent option, especially for large projects or intricate designs.
You might be interested in this article: Can You Stain Plywood?
Step-by-Step Guide to Painting Plywood
Once your plywood is prepped and primed, it’s time to start painting. Here’s a step-by-step guide on how to paint plywood effectively:
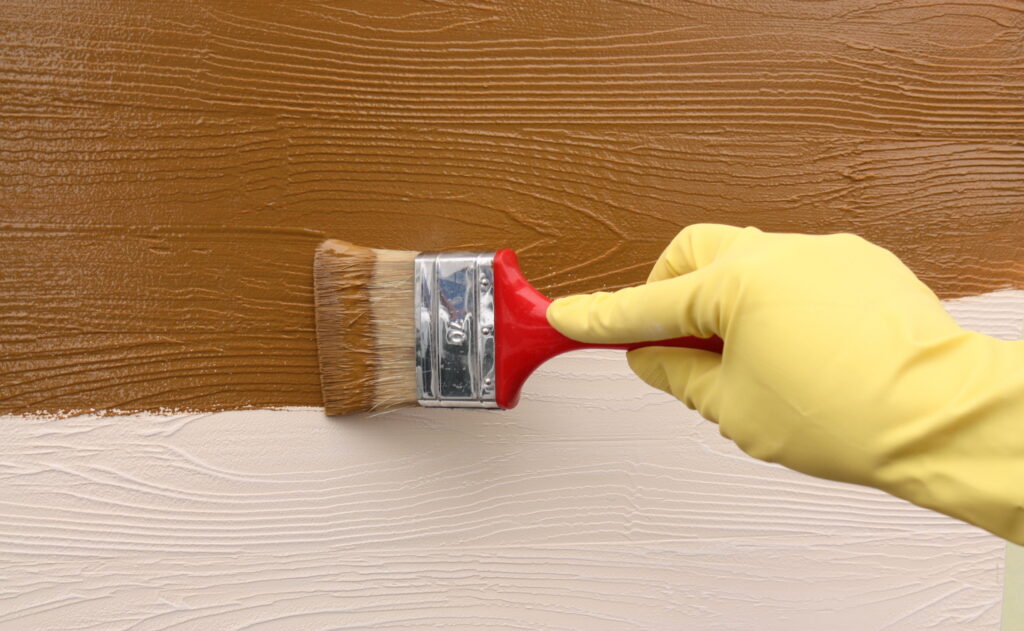
Applying the First Coat of Paint
Begin by applying the first coat of paint with your chosen tool. If you’re using a brush, apply the paint in thin, even layers, working in the direction of the grain. If you’re using a roller, make sure to apply the paint evenly and avoid overloading the roller with too much paint, which can lead to drips and streaks.
Drying and Curing Times
Allow the first coat to dry completely before applying additional coats. Drying time will vary depending on the type of paint you’re using and the environmental conditions (e.g., temperature and humidity). Check the manufacturer’s instructions for guidance, but typically, it’s best to wait 1-2 hours between coats.
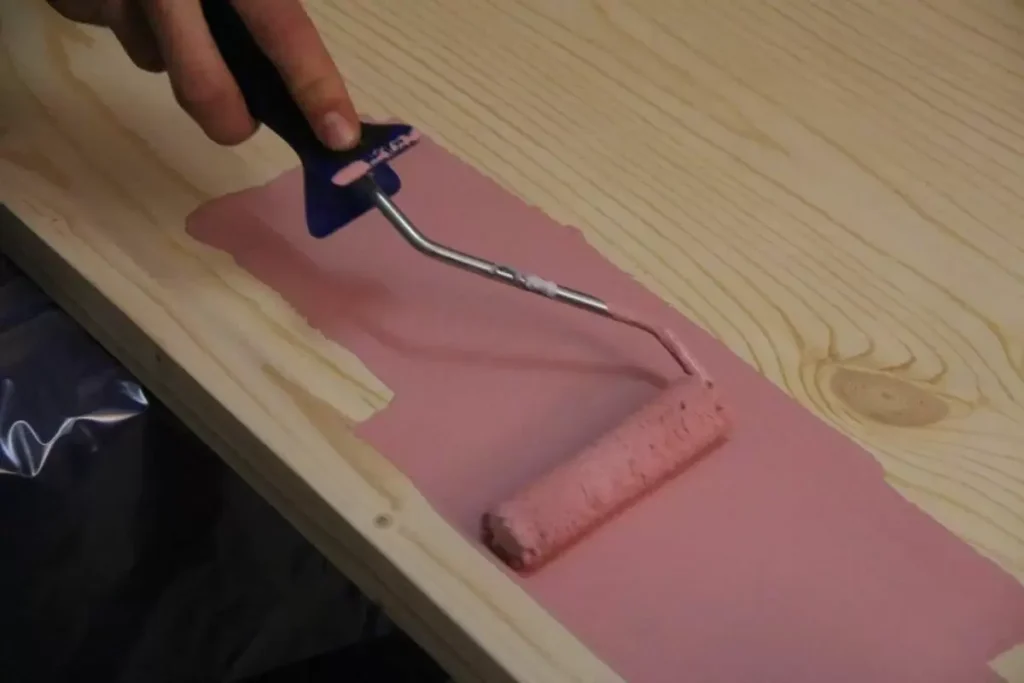
Applying Additional Coats
For full coverage and a smooth finish, you’ll likely need at least two coats of paint. After each coat, lightly sand the surface with fine-grit sandpaper to ensure the paint adheres properly and to remove any imperfections. Continue applying coats until you’re satisfied with the finish.
Dealing with Plywood’s Grain
Plywood has a visible grain that can show through the paint, especially with lighter colors or thin coats. To minimize this, you may need to apply additional coats of paint or use a grain filler to fill in the texture. Sanding between coats can also help smooth out the grain and ensure an even surface.
Finishing Touches
Sealing the Painted Surface
To protect the paint and extend the life of your project, apply a clear topcoat or sealant once the paint has dried completely. Polyurethane, varnish, and polycrylic are common choices for topcoats, each offering varying levels of protection and shine. Apply the topcoat evenly using a brush or roller, and allow it to cure fully.
Cleaning Up
After completing your project, clean your painting tools thoroughly. Brushes can be cleaned with soap and water if you used water-based paint, or with paint thinner for oil-based paints. Properly dispose of any leftover paint and cleaning materials, following local guidelines for disposal.
Common Mistakes to Avoid
While how to paint plywood may seem simple, there are several common pitfalls that can affect the quality of your work. Here’s how to avoid them:
- Skipping Surface Preparation: Not cleaning, sanding, and priming the plywood properly can lead to poor adhesion and an uneven finish.
- Using the Wrong Paint or Primer: Always ensure that the paint and primer you select are suitable for plywood and appropriate for the intended use.
- Not Allowing Enough Drying Time: Skipping the recommended drying times between coats can result in smudging or peeling paint.
- Overloading the Brush or Roller: Applying too much paint can cause drips and uneven coverage. It’s better to apply thin, even coats and build up the color gradually.
You might be interested in this article: What Type of Plywood for Subfloor?
Maintaining the Painted Plywood
Once your plywood has been painted, it’s essential to care for it properly to ensure it stays looking great. Regular cleaning with a damp cloth and avoiding harsh chemicals will preserve the finish. If you notice any scratches or chips in the paint, touch up those areas to keep the plywood looking pristine.
Alternatives to Painting Plywood
If you’re not sure about painting your plywood, there are other options you can consider:
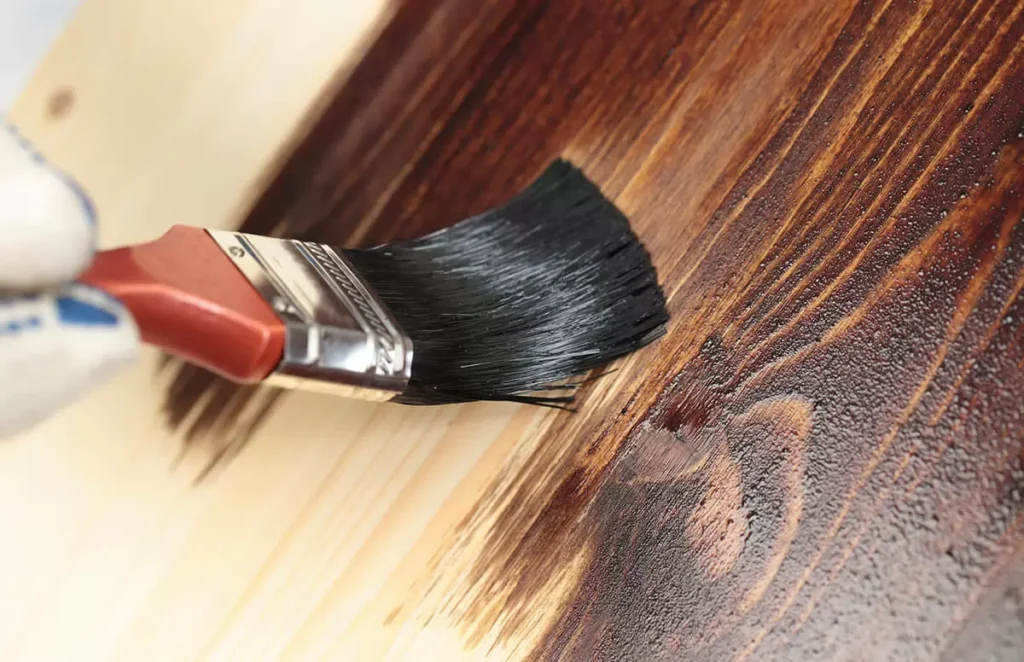
Staining Plywood
Instead of painting plywood, you can stain it to enhance the natural wood grain. Staining preserves the wood’s texture while adding color. However, staining may not provide the same level of protection as paint, so it’s important to seal the wood afterward.
Varnishing or Sealing Without Paint
If you prefer to showcase the natural beauty of the plywood, consider using a clear varnish or wood sealer. This option highlights the wood grain and provides protection without masking it with paint.
Conclusion
In conclusion, how to paint plywood is a straightforward process that can transform a basic material into something beautiful and durable. By following the steps outlined in this guide, you’ll achieve professional results, whether you’re painting furniture, walls, or cabinetry. Remember that preparation is key to success, and taking your time to select the right paint and tools will ensure that your plywood project looks stunning and lasts for years. Happy painting!