
Wooden cabinets are a centerpiece of many kitchens and bathrooms. Their beauty and durability make them a great investment, but like anything else, they are susceptible to wear and tear over time. If you’ve found yourself staring at peeling, chipped, or dated painted cabinets, the idea of updating them by removing the old paint might be a great option. But you might be asking, “How to remove paint from wood cabinets?” Don’t worry; we’ve got you covered with this detailed, step-by-step guide that will help you refresh the appearance of your cabinets, whether you want to restore the natural wood grain or apply a new layer of paint. By following this guide, you’ll achieve a pristine surface ready for a stunning finish.
Why You Might Want to Remove Paint from Wood Cabinets
Removing paint from wood cabinets may sound like a daunting task, but it is actually one of the most rewarding home improvement projects you can undertake. Whether you’re dealing with cabinets that are chipped and peeling or ones with a layer of outdated paint that doesn’t match your current decor, removing the old paint can breathe new life into your space. Restoring or refinishing your cabinets allows you to create a more modern or timeless look, or even bring out the natural beauty of the wood beneath.
Additionally, removing paint from wooden cabinets is often the first step before applying a fresh coat of paint or stain. A clean, smooth surface will ensure that your new finish adheres properly and lasts longer. The goal is to make your cabinets look fresh, renewed, and better than ever. This step-by-step guide will help you navigate every part of the process, providing helpful tips and tricks along the way.

Reasons to Strip Paint From Wooden Cabinets
There are several compelling reasons to remove paint from wood cabinets. It can not only improve the aesthetics of your space but also allow you to restore the wood to its original state. Here are some of the main reasons why homeowners decide to strip the paint:
Reviving Natural Wood Beauty
The natural wood underneath layers of paint might be more beautiful than you think. Stripping away the paint will reveal the grain, knots, and texture that often get hidden by layers of old paint. Whether you want to sand the wood for a sleek look or apply a fresh stain, removing the paint brings out the true character of the wood.
Better Surface for Repainting or Refinishing
Paint tends to wear down over time, leading to chips, scratches, and a dull finish. By removing the paint, you’re essentially starting fresh, giving you a clean slate for applying new paint or a different finish. The key to achieving an even, smooth surface lies in stripping the old paint completely.
Customization and Personalization
Maybe your old painted cabinets no longer match your home’s style or the latest trends. By removing the old paint, you have the chance to repaint or stain the wood to suit your current taste, creating a personalized look. Whether you want a glossy modern finish or a rustic matte look, this project gives you full control over the outcome.
Increased Home Value
Refinishing or restoring wooden cabinets can enhance your home’s overall appearance and add value. Potential buyers are often drawn to kitchens and bathrooms with updated, well-maintained cabinetry. Therefore, knowing how to remove paint from wood cabinets correctly and achieving a flawless finish can be a smart investment.

Choosing the Right Tools and Materials for the Job
Before you start removing paint from wood cabinets, it’s essential to gather the appropriate tools and materials. The right equipment will make the job easier, safer, and more efficient. Let’s take a look at the essential tools and materials you will need.
Paint Strippers and Removers: Chemical vs. Natural
When it comes to removing paint from wood cabinets, one of the most commonly used tools is paint stripper. These products are designed to break down the bond between the paint and the wood, allowing you to peel or scrape the paint off easily. There are two main types of paint removers: chemical and natural.
Chemical Paint Strippers
Chemical paint removers are the most effective at stripping paint quickly, but they require careful handling. These products often contain harsh chemicals like methylene chloride or sodium hydroxide, which can be harmful to your skin, eyes, and respiratory system. Therefore, when using chemical paint strippers, be sure to follow safety precautions, such as wearing gloves, goggles, and working in a well-ventilated space. Chemical paint removers can work wonders when you’re wondering how to strip paint from wooden cabinets, as they break down the paint and make it easier to scrape off.
Natural Paint Removers
For a more eco-friendly option, you might want to consider using natural paint removers, such as citrus-based products, vinegar, or a mixture of baking soda and water. These alternatives are generally less toxic but may take more time and effort to remove the paint thoroughly. While they can work well for lighter layers of paint, they may not be as effective for thick or stubborn coatings. However, for those sensitive to chemicals or looking for a gentler approach, natural paint removers can be an excellent solution.
Scrapers, Sandpaper, and Other Essential Tools
In addition to paint strippers, you will need a few basic tools to help you remove the paint from your wooden cabinets effectively.
Scrapers
Scrapers are used to physically remove the loosened paint from the wood surface. Plastic scrapers are often preferred for their ability to glide smoothly over the surface without scratching the wood. However, metal scrapers can be more efficient for tougher paint layers, although you should be careful not to gouge the wood.
Sandpaper
Once the majority of the paint is removed, sanding is the next step. Sandpaper will help smooth the surface and remove any remaining paint residue. Choose sandpaper with a medium grit (120-grit) for initial sanding and finish off with a fine grit (220-grit) to ensure the surface is smooth and ready for refinishing.
Wire Brush
A wire brush can be useful for scrubbing away any stubborn paint that refuses to come off easily. For thick or hard-to-remove paint, this tool can be an effective solution.
Paintbrush
A paintbrush is necessary for applying paint removers to the surface of the cabinets. Choose a brush with a sturdy handle and soft bristles for smooth application.
Safety Gear: Gloves, Goggles, and Ventilation
Safety should always be a priority when working with paint removers and sanding. Always wear protective gloves to avoid skin irritation, and use goggles to protect your eyes from splashes or dust. If you’re working with chemical strippers, be sure to use the product in a well-ventilated area. Open windows and use fans to keep fresh air circulating, as the fumes from paint removers can be toxic.
Preparing Your Workspace: Setting Up for Success
Preparing your workspace before beginning the process of removing paint from wood cabinets is essential for both safety and efficiency. Here’s how you can set up a successful work area.
How to Protect Your Floors and Surrounding Surfaces
Paint removal can get messy. To prevent damage to your floors and nearby furniture, cover the area with plastic sheets or drop cloths. Make sure to protect your countertops, appliances, and any other surfaces that might come in contact with paint remover or dust. By taking this precaution, you’ll avoid costly cleanup or damage to your home.
Proper Ventilation and Safety Precautions
As mentioned earlier, chemicals in paint removers can produce harmful fumes, so it’s crucial to work in a well-ventilated area. If you are working in a smaller room, consider using a respirator mask designed for chemical fumes to protect your lungs. If you’re removing paint outdoors or in a large open space, the risk of inhaling fumes is lower, but it’s still important to wear a mask if necessary.
Step 1: Testing the Paint Type and Choosing the Best Method
Before you apply any paint remover, you need to determine the type of paint on your cabinets. Knowing how to take paint off wood cabinets effectively requires understanding whether the paint is oil-based or water-based. Here’s how to test the paint type:
Identifying Oil-Based vs. Water-Based Paint
To identify the paint type, apply a small amount of rubbing alcohol to an inconspicuous area of the cabinet. If the paint softens and begins to come off easily, you’re likely dealing with water-based paint. If the paint resists removal, it’s probably oil-based. The type of paint will determine which kind of remover you need.
How to Test for Lead Paint and When to Seek Professional Help
If your home was built before 1978, there is a chance that the paint contains lead. Lead-based paint can be hazardous if not handled properly, and it’s essential to test for lead before you begin. You can purchase lead testing kits or hire a professional to conduct the tests. If lead is found, it’s best to seek professional help to ensure that the removal process is done safely.
Step 2: Applying Paint Remover: Tips for Effective Use
Once you’ve determined the paint type and chosen the appropriate remover, it’s time to apply the paint stripper. Proper application is crucial for maximum efficiency.
How to Apply Chemical Paint Removers for Maximum Efficiency
When using a chemical paint remover, apply the product generously using a paintbrush. Make sure the entire surface is covered and allow it to sit for the time specified in the instructions (usually 15 to 30 minutes). As the paint begins to soften, use your scraper to lift and remove it. For optimal results, you may need to apply a second coat of remover for stubborn areas.
Natural Paint Removal Methods: Baking Soda and Vinegar Solutions
If you prefer to avoid chemicals, natural alternatives such as a baking soda and water paste or a vinegar solution can help remove paint. These methods are slower but can be effective for lighter layers of paint. Simply apply the paste or solution to the paint, let it sit for a few minutes, and then scrape it off.
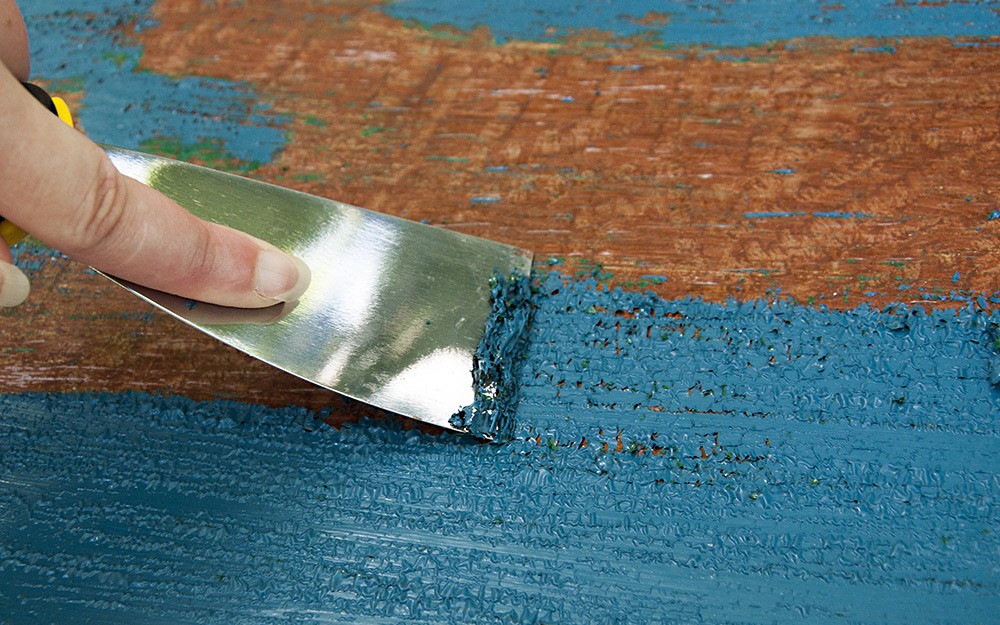
Step 3: Scraping and Removing the Paint: Techniques for a Smooth Finish
Once the paint has softened, you can begin scraping it away. This step requires patience and precision.
How to Safely Scrape Away Old Paint Without Damaging the Wood
Use a plastic scraper to gently lift the paint from the wood. Be careful not to apply too much pressure, as you don’t want to gouge the wood. For thick layers of paint, you may need to repeat the application of the paint remover.
Dealing with Stubborn, Thick Layers of Paint
If you encounter stubborn paint that doesn’t come off easily, try reapplying the paint remover and allowing it to sit a little longer. A wire brush or steel wool may also be useful for removing any remaining paint.
Step 4: Sanding the Wood Surface: Refining and Smoothing
After scraping off the majority of the paint, sanding will help create a smooth, even surface that’s ready for refinishing.
How to Choose the Right Grit Sandpaper
Begin with a medium-grit sandpaper (120-grit) to smooth out rough spots, then switch to a finer grit (220-grit) for a sleek, even finish. Make sure to sand with the grain of the wood to avoid scratches.
Sanding Techniques to Ensure an Even Surface
When sanding, focus on areas that may still have paint remnants, and be careful not to over-sand. It’s best to use a light touch to avoid damaging the wood.
Step 5: Cleaning the Surface After Paint Removal
Once the sanding is done, thoroughly clean the wood to remove any dust, debris, or residue from the paint remover.
Why Cleaning Is Essential Before Refinishing
Cleaning is crucial because any leftover stripper or dust can interfere with the adhesion of your new paint or stain. Wipe down the surface with a damp cloth and allow it to dry completely.
How to Remove Any Remaining Residue or Paint Stripper
If there’s still residue left from the paint stripper, use a neutralizing agent like water mixed with baking soda. This will ensure that no chemicals are left behind to affect your new finish.
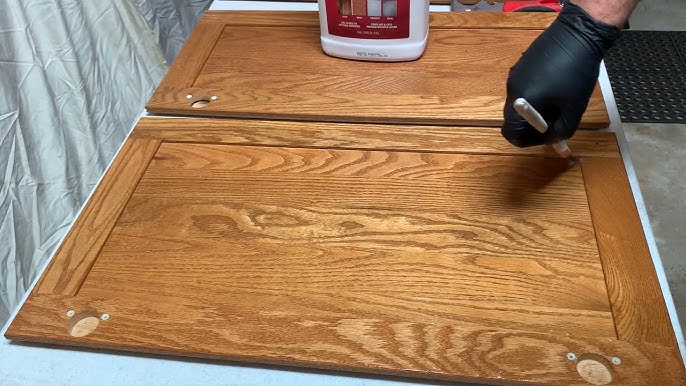
Step 6: Finishing Touches: Sealing and Preparing for New Paint or Stain
After removing the paint, sanding, and cleaning, your cabinets are ready for a fresh coat of paint or stain.
The Best Way to Prepare the Wood for a Fresh Coat of Paint or Stain
Apply a coat of primer to ensure that the new paint or stain adheres properly. Once the primer is dry, proceed with your desired finish. Be sure to apply the paint or stain evenly for the best results.
Tips for Applying the New Finish Smoothly and Evenly
Use high-quality brushes or rollers to apply the new finish. Apply thin, even coats, allowing each layer to dry completely before applying the next.
Common Mistakes to Avoid When Removing Paint from Wood Cabinets
While removing paint from wooden cabinets can seem straightforward, there are common pitfalls to avoid:
- Not Testing the Paint: Always test for lead and identify the type of paint to choose the right removal method.
- Scraping Too Aggressively: Be gentle when scraping to avoid gouging the wood.
- Rushing the Sanding Process: Take your time to ensure a smooth finish.
Conclusion: Achieving Beautiful, Paint-Free Wood Cabinets
By following these detailed steps on how to remove paint from wood cabinets, you’ll be well on your way to achieving a stunning transformation. Whether you want to bring out the natural beauty of the wood, apply a fresh coat of paint, or simply restore the cabinets to their former glory, this process will ensure the best possible result. With patience and the right tools, you’ll enjoy your updated wood cabinets for years to come. Happy DIY-ing!