
Plywood is a versatile material that’s commonly used in woodworking projects. Its affordability, durability, and flexibility make it an excellent choice for furniture, flooring, and cabinetry. However, while the surface of plywood is often smooth and easy to work with, its edges are another story. Raw plywood edges can be rough, uneven, and unsightly. If left untreated, these edges can be prone to damage and wear over time.
To get a professional finish, it’s important to focus on finishing the edges properly. Whether you’re creating furniture, shelving, or working on a flooring project, achieving smooth, clean, and well-protected plywood edges will significantly enhance the overall appearance and longevity of your work. This guide will provide you with all the techniques, tools, and tips needed to finish plywood edges like a pro, while also showing how using a plywood calculator can make your project more efficient.
Why Finishing Plywood Edges Is Crucial for Your Project
One of the most important aspects of working with plywood is its edges. While the plywood surface might look neat, raw edges expose the layers of wood veneer that are stacked together. These layers often look rough and unfinished, which can detract from the overall aesthetic of your project. In some cases, these exposed layers might even cause structural issues or weaken the plywood if they’re not properly sealed and treated.
Not only do raw edges look unattractive, but they can also be more vulnerable to moisture, dirt, and physical damage. For example, moisture can seep into the exposed layers of plywood, causing them to swell and degrade over time. This will shorten the lifespan of your project and can lead to costly repairs in the future. By finishing plywood edges properly, you provide a protective layer that keeps your project looking great and standing the test of time.
Finishing plywood edges also creates a polished, professional appearance. Whether you’re making a simple DIY project or constructing high-end custom furniture, paying attention to edge details elevates the overall quality of your work. It’s an easy step that will make your project look more refined and give it a level of craftsmanship that’s noticed by anyone who sees it.
A Quick Overview of Popular Finishing Methods
There are several methods for finishing plywood edges, each with its own set of advantages. These methods vary in complexity, time commitment, and cost. Let’s quickly explore the most common techniques:
- Sanding and Polishing: This is the simplest and most basic method. Sanding helps to smooth the rough edges of plywood and prepares them for additional treatments such as sealing or staining.
- Edge Banding: Edge banding involves applying a material (such as wood veneer or plastic) around the raw plywood edge. This gives the edge a clean, finished look, and it’s a quick, effective way to treat edges.
- Routing: For those looking for precision and decorative flair, routing provides a way to shape and smooth edges with greater detail. It’s particularly useful when you want more intricate edge profiles.
- Sealing: After sanding and smoothing the edges, sealing them ensures that they’re protected from damage such as moisture absorption, dirt buildup, and wear and tear. Sealing makes the edges more durable and helps maintain their integrity for longer.
Each technique offers its own set of benefits, and choosing the right method depends on the type of project, the look you want to achieve, and how much time you have to invest. A plywood calculator can help ensure you use the correct amount of materials for edge banding or veneer, so you won’t have to waste resources.
How to Edge Plywood: The Essential Guide for Beginners and Pros
What Does Edging Plywood Involve?
When we talk about edging plywood, we’re referring to the process of refining the raw, exposed edges of the plywood material. This typically involves smoothing plywood edges, sanding and trimming them, and then applying additional treatments like sealing, staining, or edge banding. The goal is to ensure the edges not only look smooth but are also well-protected against future damage.
The right edge treatment can help the plywood blend seamlessly with the rest of the project, hide the exposed plywood layers, and offer long-lasting protection.
You might be interested in this article: How to Paint Plywood
The Best Tools for Edging Plywood (and When to Use Them)
To finish plywood edges properly, you need the right tools. Selecting the right tool for each task can make a huge difference in achieving a smooth, professional result. Here’s a breakdown of the most common tools used for plywood edge treatment:
- Hand Sander: A hand sander is great for smoothing the rough edges of plywood. It helps remove any splinters and ensures the edges are clean and even. A hand sander is perfect for beginners who want a straightforward approach to sanding the edges.
- Router: A router is a powerful tool used for creating precise, clean edges. It’s perfect for intricate designs and detailed edges. You can achieve a variety of effects, such as rounded or beveled edges, with the right router bit.
- Jigsaw: A jigsaw is an ideal tool for cutting plywood into different shapes. It’s especially useful when you need to cut out irregular or curved edges. Once the shape is cut, you can use sandpaper or a sander to smooth out the edges.
- Edge Banding Iron: When using iron-on edge banding, an edge banding iron is required. This tool heats up the adhesive on the back of the banding, allowing it to bond firmly to the plywood edge. It’s a quick and efficient way to apply veneer to the edges.
- Trim Router: Smaller than a regular router, a trim router is perfect for detailed edge work. It’s ideal for smaller projects and can help you refine smaller edges or work on more intricate designs.
Using the right tool for the job is key to achieving a professional look. To further help with planning, a plywood calculator can help you calculate how much edge banding or veneer you’ll need for your project, making sure you purchase the correct amount of materials.

Step-by-Step Process: How to Edge Plywood for a Smooth Finish
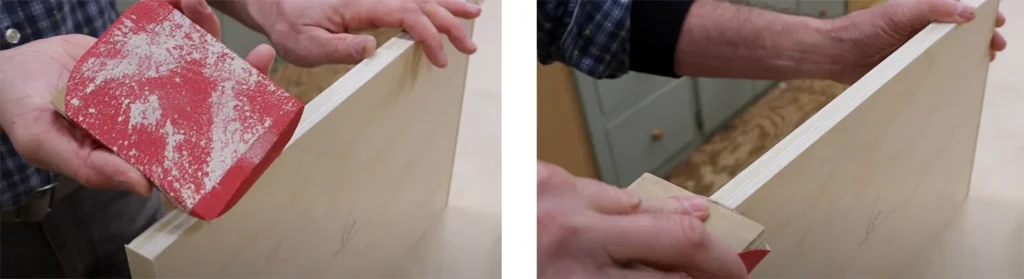
- Preparing the Plywood: Sanding and Cleaning
The first step is sanding the edges of the plywood. Sanding smooths out rough spots and prepares the wood for any additional treatments, like sealing or staining. Use medium-grit sandpaper to get rid of any noticeable imperfections and create a clean surface. After sanding, be sure to clean off any dust or debris so that the surface is clear for the next step. - Choosing the Right Edge Banding Material
Edge banding comes in a variety of materials, including wood veneer, PVC, melamine, and more. The type of material you choose depends on the appearance and durability you’re aiming for. For a natural look, wood veneer is often preferred, while melamine offers increased durability for projects like shelving or cabinetry. Using a plywood calculator helps ensure you have enough of the chosen material to complete the project. - How to Apply Edge Banding with Precision
After selecting your edge banding material, the next step is applying it to the plywood edges. Depending on the material, you can either use a hot iron (for iron-on edge banding) or adhesive to bond the banding to the edges. Be sure to press the banding down firmly and trim any excess material using a razor blade or utility knife. After trimming, smooth the edges with sandpaper to ensure a clean, neat finish. - Using a Router for Clean, Sharp Edges
If you want more intricate edge profiles, using a router can give you greater precision. Routers allow you to create detailed, smooth edges such as rounded or beveled finishes. Choose the right router bit based on the type of edge you want to create. If you’re new to routing, start with a simple rounded edge to get the hang of the tool. Using a plywood calculator can help you determine the correct dimensions for the router, ensuring that you don’t cut too much or too little. - Finishing Plywood Edges: Different Techniques for Different Results
After the edges are smooth and properly shaped, it’s time to finish them. Sanding the edges gives them a smooth feel, but you may also want to stain, paint, or seal them depending on your project’s needs. Different techniques such as plywood edge smoothing or plywood edge finishing can help you achieve the desired effect. Consider the overall style of your project — whether it’s rustic, modern, or traditional — and finish your edges accordingly.
Wood Veneer Edge Banding: Elegant and Durable
Wood veneer is one of the most popular materials for edge banding. It offers a natural wood appearance and is a durable option for most plywood projects. Veneer provides a seamless, elegant look that blends perfectly with plywood. The high-quality finish it creates enhances the overall aesthetic of your project. Properly finishing plywood edges with wood veneer helps create a refined, professional appearance. A plywood calculator can help you estimate the amount of veneer you need for all edges, so you don’t end up purchasing more than required.
Iron-on Edge Banding: Fast and Easy
Iron-on edge banding is a popular choice for DIYers because it’s fast and easy to apply. The adhesive on the back of the veneer activates when heat is applied from an iron, bonding the veneer to the plywood edges. This technique is ideal for smaller projects or when you need a quick finish. While the process is quick, the results can still be professional, making it a favorite for many. Finishing plywood edges with iron-on banding offers both efficiency and great visual results.
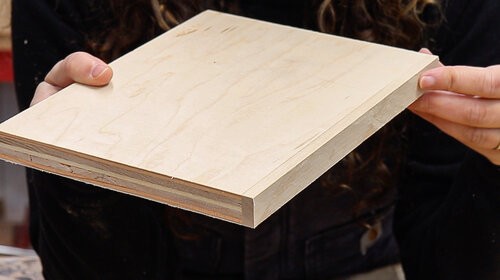
Solid Wood Edging: The High-End Look
For a premium finish, solid wood edging is an excellent choice. This technique involves gluing strips of solid wood to the edges of plywood, which creates a more substantial and durable edge. The natural beauty of the solid wood is showcased, giving your project a high-end look. While this method takes more time and effort, the result is a long-lasting and elegant finish. Finishing plywood edges with solid wood gives your project a luxurious feel that stands out.
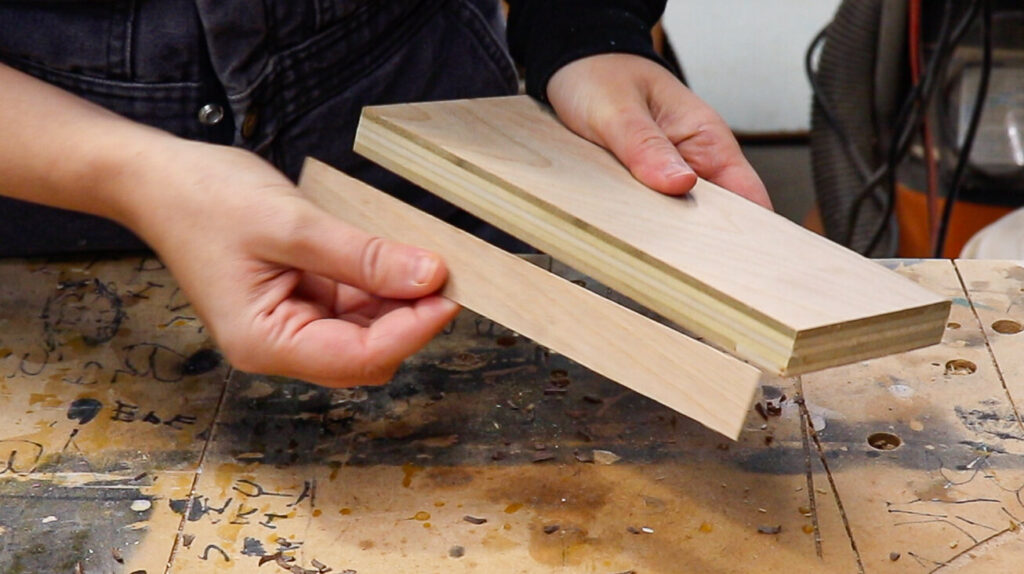
Using Plywood Strips for a Seamless Edge
Another approach to edging plywood is using strips of plywood to create a seamless edge. This method works well when you want to maintain a consistent, smooth appearance throughout the plywood. It’s a great option for projects where you want to avoid the appearance of separate edge banding materials. This technique requires precise cutting and careful alignment to ensure the edges match up perfectly, providing a flawless finish for your project.
How to Edge Plywood for a More Professional Appearance
To achieve a professional appearance, make sure to take your time at each stage of the edging process. Carefully sand the edges, apply edge banding or veneer, and finish with appropriate sealing or staining. Using the right tools, such as a plywood calculator, will help ensure that your project is completed accurately and efficiently.
You might be interested in this article: How to Unwarp Wood
Dealing with Rough or Damaged Edges
If you’re working with plywood that has rough or damaged edges, the first step is to sand them down to remove imperfections. You may need to trim the edges if they’re severely damaged. Once the edges are smooth, you can apply your preferred edge treatment. Using a plywood calculator will help you determine how much material you’ll need for edge banding or refinishing.
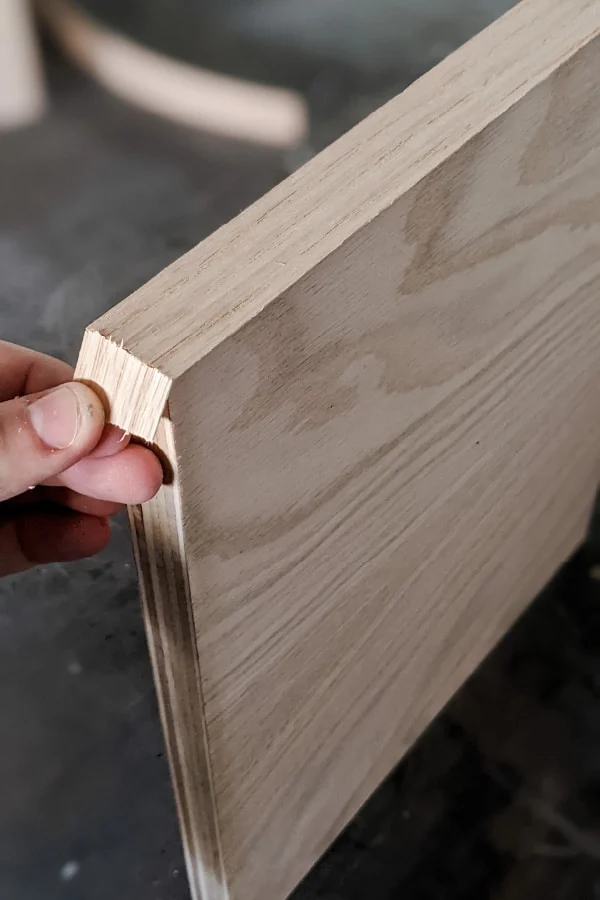
How to Hide Exposed Plywood Layers
Exposed plywood layers can be unsightly, but they can easily be hidden by applying edge banding or veneer. This helps cover up the layers and creates a uniform edge that matches the rest of the plywood surface. If you want a more decorative finish, you can use a router to create detailed edges that further disguise the exposed layers.
Sanding and Staining the Edges for a Polished Finish
Sanding and staining the edges of your plywood is an important part of the finishing process. Sanding ensures that the edges are smooth and free from rough spots, while staining adds color and enhances the natural beauty of the wood. After staining, you should apply a protective sealer to the edges to ensure they remain durable over time. When it comes to finishing plywood edges, attention to detail during this step makes all the difference.
Sealing the Edges to Prevent Damage
Sealing is a critical step in ensuring that your plywood edges remain in good condition. Sealing helps protect the edges from moisture, dirt, and wear. Without a proper seal, the edges can become damaged and wear down more quickly. Use a high-quality sealant that matches the finish of your plywood to ensure the edges are properly protected. Proper sealing is an essential part of the process of finishing plywood edges to preserve the wood’s integrity.
How to Edge Plywood for Specific Projects: Tailoring Your Approach
Each project requires different edge treatments based on its intended use and design. Whether you’re working on furniture, flooring, or cabinetry, tailor your edging approach to suit the specific project. For example, when working with furniture, solid wood edging may be the best option, while edge banding may be more appropriate for smaller projects. A plywood calculator can help ensure you purchase the correct amount of materials for your project.
Edging Plywood for Furniture: Cabinets, Shelves, and Desks
When crafting furniture, especially pieces like cabinets, shelves, and desks, the appearance of your plywood edges plays a critical role in achieving a professional, high-quality finish. Solid wood edging is a popular choice for premium furniture items, as it not only enhances the overall aesthetic but also adds durability to the structure. For a more budget-conscious approach, veneer edge banding provides a sleek and cost-effective solution while still offering an elegant look. Whether you’re building custom cabinetry or a stylish desk, finishing plywood edges with care is crucial for achieving a polished, refined look that will elevate the entire project.
Precision in edge finishing is essential — it not only impacts the visual appeal but also the longevity and functionality of the piece. A well-finished edge can give even a simple plywood project a high-end look that enhances your craftsmanship.
You might be interested in this article: RTD Plywood vs CDX Plywood
Finishing Plywood Edges for Flooring Projects
Plywood used in flooring requires special attention to edge finishing, as the edges will be subjected to daily foot traffic and wear. For flooring projects, the edges must be durable and resistant to moisture, dirt, and other environmental factors. Finishing plywood edges for flooring involves more than just aesthetics — it’s about creating a long-lasting, practical finish that can withstand constant use.
Sanding the edges to a smooth finish is the first step in ensuring the plywood will accept the sealing treatments needed for durability. Once sanded, applying a protective sealer will help lock in moisture resistance and prevent damage over time. You may also want to consider additional treatments such as edge banding for added durability and to create a seamless look. Proper finishing will ensure that every inch of your flooring project is protected and looks professional.
Edging Plywood for Outdoor Use: Weatherproofing Techniques
When working on plywood projects that will be exposed to the outdoors, weatherproofing the edges is a critical step in ensuring long-term performance. Plywood edges that are left raw are highly susceptible to moisture, dirt, and other environmental factors. For outdoor projects such as furniture, decking, or garden structures, sealing and protecting the edges is essential to prevent swelling, warping, and degradation caused by weather exposure.
To properly weatherproof your plywood edges, begin by sanding them smooth and then applying a high-quality wood sealer or weatherproofing treatment designed for outdoor use. For an extra layer of protection, you may also want to consider edge banding with a material that provides added resistance to the elements, such as plastic or metal. Proper weatherproofing will extend the life of your outdoor plywood project and keep it looking great for years to come.
Mistakes to Avoid When Finishing Plywood Edges
One of the most common mistakes when finishing plywood edges is using the wrong tools. Whether it’s a dull router bit, improper sanding equipment, or the wrong type of adhesive for edge banding, using subpar tools can result in poor outcomes. Always make sure you have the right tools for the specific finishing method you’re using to achieve clean, professional results.
Skipping Sanding and Preparation
While it may seem like an extra step, skipping proper sanding and preparation can lead to uneven edges and a less-than-perfect finish. Sanding is essential for smoothing the rough, raw edges of plywood, and it ensures that any finishing materials, such as veneer or sealant, will adhere properly. Skipping this step may also leave visible imperfections that detract from the overall appearance of your project.
Choosing the Wrong Edge Banding Material
Another common mistake is choosing the wrong edge banding material for your project. It’s important to select a material that not only complements the look of your plywood but also suits the specific needs of your project. For example, using wood veneer for a piece that will be exposed to the elements may not be as durable as a plastic or metal banding. Consider the project’s purpose, environment, and desired finish before selecting your edge banding material.
Not Sealing Edges Properly for Long-Term Durability
Failing to seal the edges of plywood properly is a mistake that can lead to long-term damage. The edges are the most vulnerable part of plywood, and if not sealed correctly, moisture and dirt can seep in, causing the wood to swell, crack, or deteriorate. Whether you’re working on furniture, flooring, or outdoor projects, sealing the edges is a vital step in ensuring the durability and longevity of your project.
Alternative Edge Finishing Ideas: Thinking Outside the Box
Using Decorative Trim for a Unique Look
Add a decorative trim to your plywood edges for a unique, personalized touch. This can add a creative flair to your project, especially if you’re going for an industrial or rustic look.
Applying Paint or Stain to the Edges
Painting or staining the edges gives your project a custom look. Choose colors that complement the rest of your design to make the edges blend seamlessly with the plywood.
Creative Methods for Industrial-Style Projects
If you’re working on an industrial-style project, leave the edges rough or unfinished for a more authentic look. You can also try using metal or other unconventional materials to trim the edges for a more industrial aesthetic.
Wrapping Up: Perfecting the Edge Every Time
Finishing plywood edges may seem like a small detail, but it can significantly impact the overall appearance and durability of your project. By using the right tools and techniques, you can achieve a smooth, polished finish. Using a plywood calculator will help you ensure that you buy the right materials and have everything you need to complete the project successfully. Whether you’re using plywood edge smoothing, plywood edge refinement, or plywood edge treatment, each step will elevate your project to the next level.