
Sublimation on wood is becoming an increasingly popular method for transferring vibrant designs to various surfaces. While people often associate sublimation with fabrics or metals, wood can also be a fantastic medium for this process. If you’re looking to create personalized wooden gifts, unique home décor, or custom business branding, sublimating on wood can offer beautiful, long-lasting results. In this article, we will explore in detail how to sublimate on wood, guiding you through the entire process — from choosing materials to troubleshooting common issues. By the end of this guide, you’ll have all the tools you need to start creating stunning wooden sublimation projects.
Why Sublimate on Wood? A Fresh Approach to Personalized Designs
Sublimation on wood offers several advantages over traditional methods like painting or vinyl transfers. One of the key benefits is the way the design bonds to the wood. Unlike paint, which can peel over time, or vinyl, which may lift or crack, sublimation fuses the design directly into the wood surface. The result is a more durable, long-lasting finish that resists fading and wear.
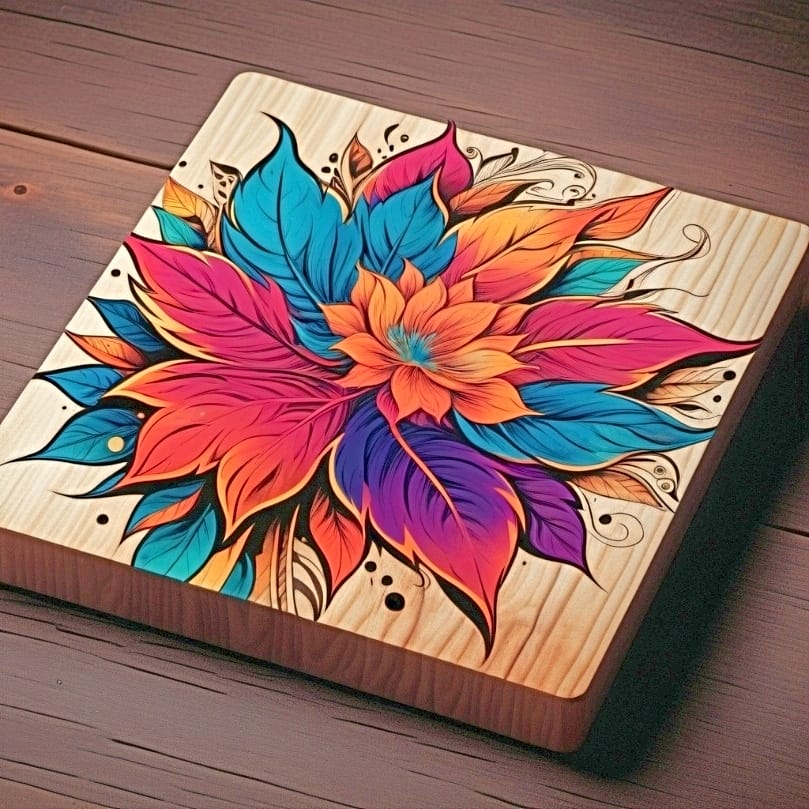
Not only does sublimation create vibrant, full-color designs, but the natural grain and texture of wood also add a unique touch that other materials simply can’t replicate. Whether you’re creating custom signs, photo frames, or even promotional items for your business, sublimating on wood can help you achieve a high-quality, professional result.
What Is Sublimation?
Sublimation is a heat-based process in which solid dye transitions directly into gas without passing through a liquid state. This gas then bonds with the fibers of the material, creating a permanent design. Unlike traditional printing, where ink sits on top of the surface, sublimation infuses the ink into the material, making it much more durable.
Key Factors for Sublimation Success
Achieving a successful sublimation project involves paying attention to a few critical factors:
- Heat: The temperature must be high enough for the ink to vaporize and bond with the surface (typically around 375-400°F).
- Pressure: The correct pressure is needed to ensure an even transfer of the image from the sublimation paper to the wood.
- Time: The proper timing (usually between 60-120 seconds) ensures that the image is transferred effectively without damaging the wood.
Understanding these factors is key to ensuring a smooth and successful sublimation process. Without the right combination of heat, pressure, and time, you may not achieve the desired results.
Why Choose Wood for Sublimation?
Wood offers unique advantages as a medium for sublimation, both in terms of aesthetics and durability. Here’s why wood can be a great choice for your sublimation projects:
Aesthetic Qualities of Wood
One of the most appealing aspects of sublimating on wood is the natural texture and grain patterns that each piece of wood brings to the table. No two pieces of wood are alike, which means each sublimated item will be unique. The wood grain can complement or enhance the design, giving your final product a rustic and organic feel that can’t be achieved with synthetic materials.
Moreover, wood provides a timeless and versatile look that works in a wide range of design contexts, from rustic home décor to elegant personalized gifts. The rich, warm tones of wood provide a perfect backdrop for vivid designs, ensuring that the finished piece stands out.
Durability and Versatility
Another reason to choose wood for sublimation is its durability. Unlike other materials, sublimated designs on wood will not peel, fade, or rub off with regular use. This makes it ideal for projects that require longevity, such as personalized kitchen items (like cutting boards), signage, and business branding products.
Additionally, wood can be used for a wide range of items, including functional items like coasters, photo frames, and plaques, as well as decorative pieces such as wall art. You can create a variety of designs with wood, making it a versatile option for both personal and professional projects.
Types of Wood That Work Well for Sublimation
When selecting wood for sublimation, the most important factor is the smoothness of the surface. Materials like MDF (Medium-Density Fiberboard), plywood, and bamboo are particularly well-suited for sublimation because they have consistent, even surfaces that allow for smooth transfers. These materials also take well to sublimation coatings, ensuring the ink bonds correctly.
Essential Equipment for Sublimating on Wood
To sublimate on wood successfully, you’ll need the right equipment. Here’s a breakdown of the essential tools required for this process:
Sublimation Printer
A specialized sublimation printer is needed to print your design onto sublimation paper. Regular inkjet printers won’t work because they use ink that doesn’t bond with the wood. Sublimation printers, such as those from Epson, are designed to use sublimation inks, which turn into gas when heated and bond directly with the wood.
When selecting a sublimation printer, make sure it’s compatible with the type of sublimation ink you plan to use. These printers are designed to produce high-quality, vibrant prints that are perfect for wood projects.
Sublimation Paper
Once you have your design, you’ll need sublimation paper to print it onto. Sublimation paper is designed to hold the ink until it is heated and transferred to the wood. The type of sublimation paper you use is crucial because it ensures that the ink doesn’t smear or fade during the transfer process.
There are different grades of sublimation paper available, and choosing the right one will depend on the type of wood and the type of design you want to create. Be sure to select high-quality sublimation paper to achieve the best results.
Heat Press Machine
A heat press is the key piece of equipment needed to transfer the image from the sublimation paper to the wood. Heat presses come in two main types: clamshell and swing-away. A clamshell press is a basic, straightforward option that opens and closes like a clamshell, while a swing-away press moves the top plate away from the work surface.
When selecting a heat press for sublimating on wood, make sure the machine has adjustable temperature and pressure settings. This will ensure that you can apply the perfect amount of heat and pressure for your wood type.
Protective Items
To protect your work and get the best results, you’ll need a few additional items:
- Silicone sheets: These help distribute pressure evenly and protect the wood surface.
- Teflon sheets: These prevent the sublimation paper from sticking to the wood or press.
- Heat-resistant tape: Used to secure the sublimation paper to the wood, ensuring the design doesn’t shift during the pressing process.
Wood Coating or Sublimation-Specific Wood
Not all wood types are ready for sublimation. For the best results, use wood that has been pre-coated with a special polymer or buy wood specifically made for sublimation. These types of wood are designed to allow the ink to bond with the surface more effectively, resulting in vibrant, long-lasting prints.
Preparing the Wood for Sublimation
Proper preparation is essential when sublimating on wood. Follow these steps to ensure the best possible outcome for your project.
Selecting the Right Wood
Start by choosing the type of wood that will work best for your project. Wood that has a smooth surface is ideal because it allows the sublimation ink to transfer evenly. Materials like MDF, plywood, and bamboo are commonly used because of their smooth texture and compatibility with sublimation coatings.
Surface Preparation
Once you have your wood, it’s important to prepare the surface properly. Sand the wood lightly to remove any rough spots, dust, or debris. This step ensures that the wood is clean and ready to accept the sublimation ink. Be sure to clean the wood thoroughly before proceeding with any further steps.
Applying a Coating
If your wood is not pre-coated for sublimation, you will need to apply a special sublimation coating. These coatings help the ink adhere better to the wood, ensuring a more vibrant and durable design. Follow the manufacturer’s instructions to apply the coating, and make sure the wood is fully dry before moving on to the next step.
Testing Your Wood
Before starting on your main project, it’s a good idea to test your sublimation process on a scrap piece of wood. This will help you ensure that everything is set up correctly and that the wood is compatible with the sublimation process. Testing also allows you to make any adjustments before committing to a larger project.
Designing Your Image for Sublimation
Creating the right design is crucial for a successful sublimation project. Here’s how to prepare your image for sublimation on wood:
Choosing the Right Design Software
You’ll need graphic design software to create your sublimation artwork. Programs like Adobe Illustrator, Photoshop, or free options like GIMP are excellent choices. These programs allow you to create detailed designs with the correct resolution and dimensions for your project.
Preparing the Image
When designing your artwork, make sure the resolution is high (at least 300 DPI) to ensure that your design remains sharp and clear. Pay attention to the size of your design so that it fits the space on your wood surface. Consider the overall layout and how the design will look once transferred onto the wood.
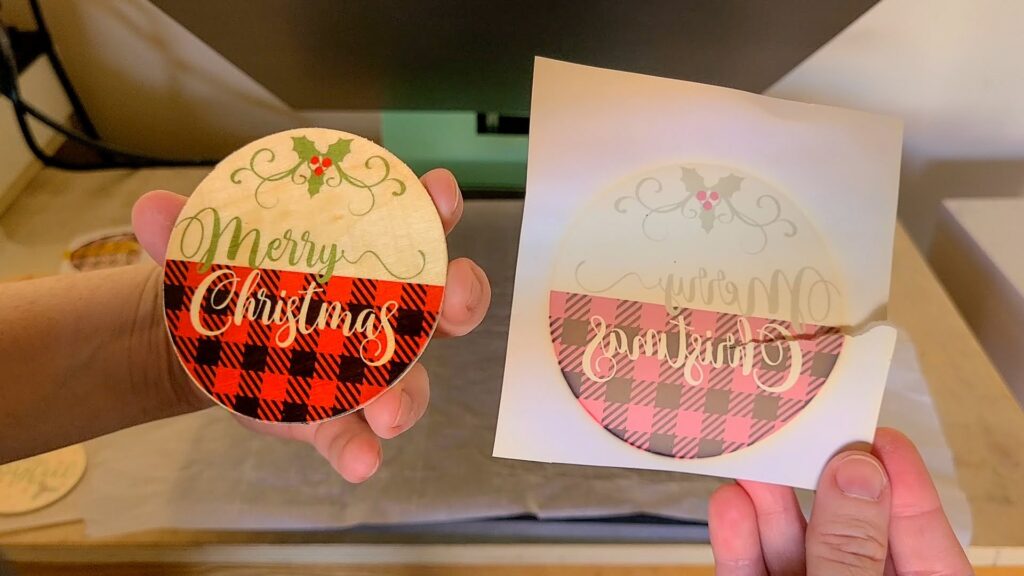
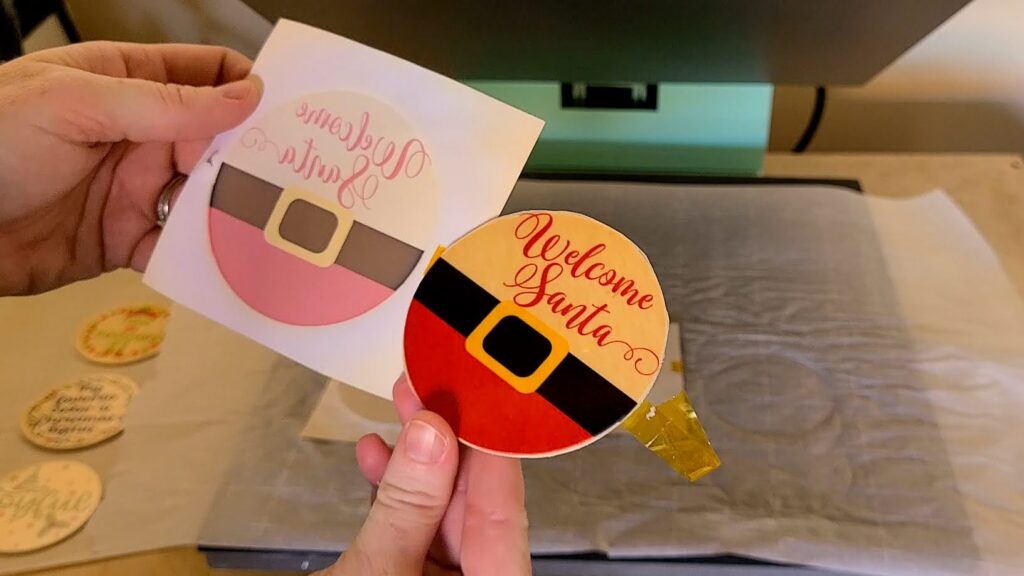
Mirroring the Design
It’s important to mirror or flip the image horizontally before printing it onto sublimation paper. This ensures that the design will appear correctly when transferred onto the wood, as the image will be printed face down during the sublimation process.
Color Considerations
Be aware that the color of your wood will affect how the final design appears. Darker woods tend to make colors look more muted, while lighter woods can make the design appear brighter. Consider how the wood’s natural color will impact your design, and adjust your colors accordingly.
The Sublimation Process on Wood
Now that the preparation is done, it’s time to sublimate your design onto the wood. Here’s a step-by-step guide for the sublimation process:
Setting Up Your Heat Press
Set your heat press to the recommended temperature for wood (typically between 375-400°F). Adjust the pressure settings based on the thickness of your wood and the type of design you’re transferring.
Positioning the Image
Place the sublimation paper with your design face down on the wood. Use heat-resistant tape to secure the paper to the wood, ensuring that it doesn’t shift during the pressing process.
Pressing the Design
Once the heat press is ready, carefully close the press and apply heat and pressure for 60-120 seconds. The time and temperature may vary depending on the type of wood, so make sure you follow the guidelines for your specific project.
Cooling the Wood
After the pressing process is complete, allow the wood to cool naturally. This cooling period helps the ink set and prevents smudging.
Removing the Paper
Once the wood has cooled, carefully remove the sublimation paper. If everything was done correctly, your design should be transferred clearly and vibrantly onto the wood.
Troubleshooting Common Issues
Even with careful preparation, sublimation on wood can sometimes result in issues. Here’s how to handle some common problems:
Uneven Transfers
If the design isn’t transferring evenly, it could be due to improper pressure or uneven heat. Make sure your heat press is calibrated correctly and check that the wood is flat and aligned properly.
Fading or Distorted Images
If your image appears faded or distorted, it could be a sign that the ink wasn’t applied evenly. Check your sublimation paper and ink, and make sure you’re using the right temperature and pressure.
Inconsistent Color Quality
Color shifts may occur, especially with darker woods. To avoid this, adjust your design for optimal color contrast, or consider using a lighter wood type for more vivid results.
Streaking or Smudging
Streaking or smudging typically happens when there’s too much pressure or if the ink didn’t bond properly. Ensure that your heat press settings are accurate and that you’re using the correct sublimation paper for your project.
Final Touches
Once your design is transferred, it’s time to complete your sublimated wood project with some finishing touches.
Sealing the Wood
After sublimating on wood, it’s a good idea to seal the surface. Sealing helps protect the design from moisture, dirt, and wear. Choose a sealer based on the finish you prefer, whether matte, glossy, or polyurethane.
Additional Creative Ideas
To add extra personality to your sublimated wood pieces, consider staining the edges or adding engraved details. These finishing touches can make your project stand out even more.
Caring for Sublimated Wood Products
To ensure your sublimated wood lasts for years, proper care is essential.
Cleaning Tips
Use a soft cloth and mild soap to gently clean your sublimated wood items. Avoid harsh chemicals that could damage the surface or the sublimated design.
Storage Recommendations
Store your sublimated wood items in a cool, dry place away from direct sunlight and moisture to preserve their quality.
Creative Ideas and Applications for Sublimated Wood
Sublimating on wood opens up endless possibilities for creative projects. Here are some ideas to get you started:
Home Décor
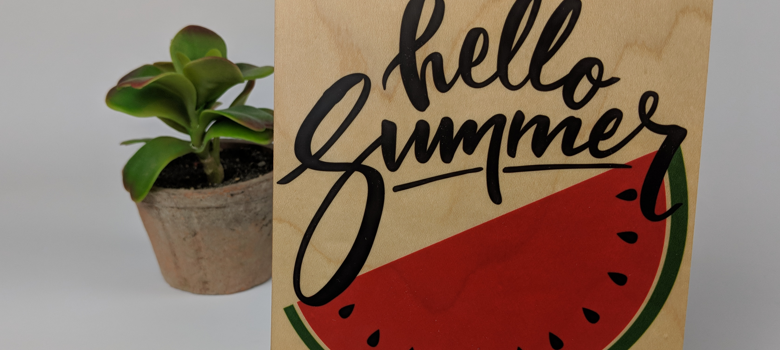
Create custom wooden signs, photo frames, coasters, or wall art to personalize your living space. Sublimated wood adds warmth and personality to any home décor.
Personalized Gifts
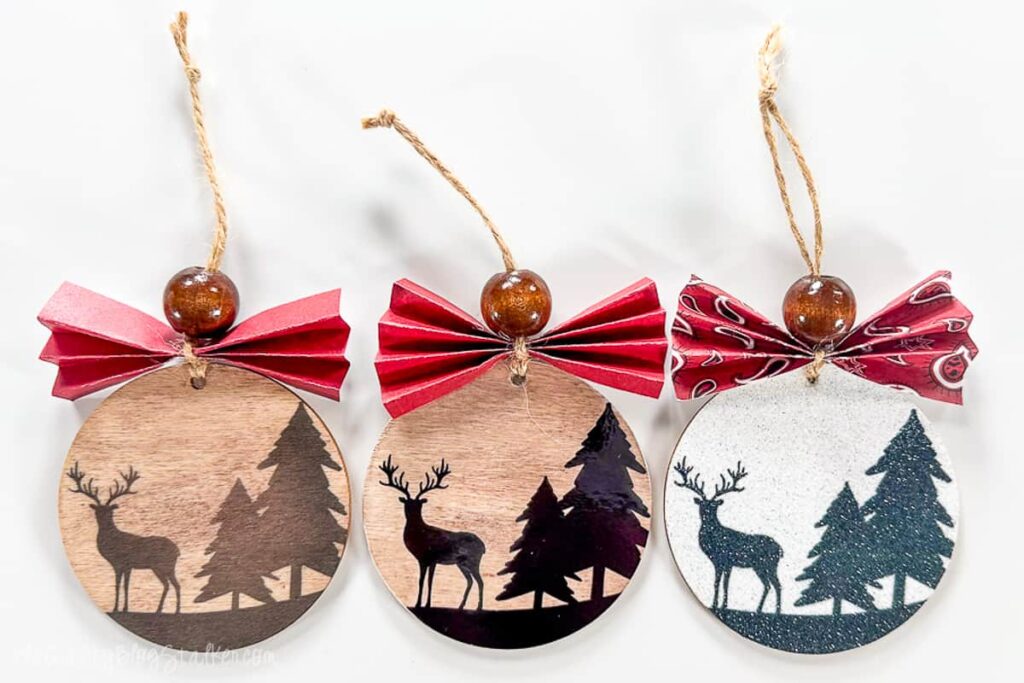
Sublimate wood to create one-of-a-kind gifts, such as keychains, cutting boards, or plaques. Personalized wooden items make great gifts for weddings, birthdays, or holidays.
Business Applications
Sublimated wood is perfect for promotional items or business branding. Create custom wooden keychains, signs, or plaques to showcase your company’s logo and message.
Seasonal Projects
You can also create customized wood pieces for holidays, events, or special occasions. Think personalized ornaments or custom photo frames for Christmas, or festive signs for other holidays.
Wrapping Up: Embrace the Creative Potential of Sublimating on Wood
Sublimating on wood is a creative and practical way to transfer beautiful, durable designs onto a variety of wooden items. By understanding the materials and process involved, you can create custom, long-lasting pieces for personal or professional use. The results are not only visually striking but also uniquely reflective of the natural qualities of wood. Now that you have all the information you need, it’s time to experiment and start creating your own sublimated wood projects!