
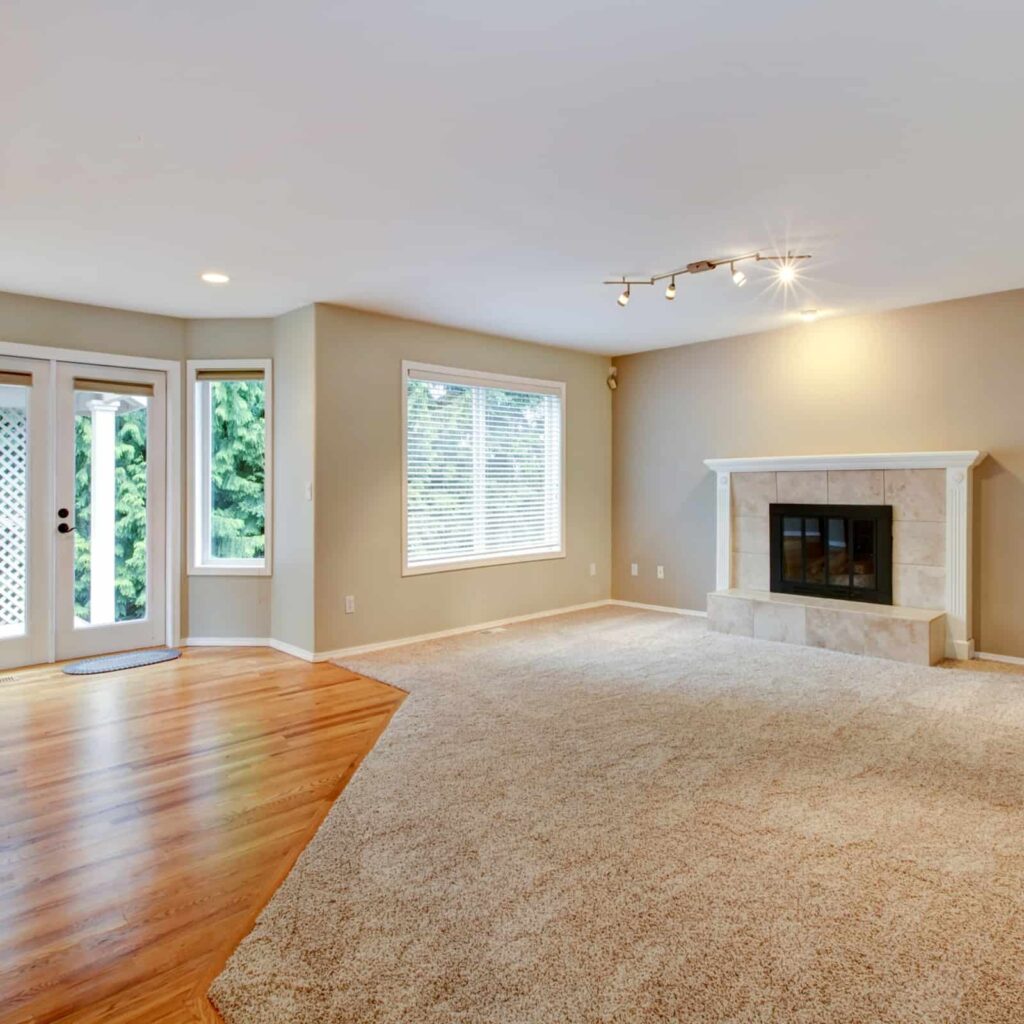
When updating or renovating your home, the idea of transitioning between two different wood floors can be both exciting and challenging. Different wood types, colors, and finishes can create a beautiful contrast, but if the transition between them isn’t handled properly, it can disrupt the flow of your space and even become a safety hazard. In this comprehensive guide, we’ll explore how to transition between two different wood floors while ensuring that the aesthetic appeal and functionality of your home are maintained.
The process of transitioning between two different wood floors involves not just the selection of materials but also understanding factors like height differences, finish consistency, and placement of transition strips. With careful planning and a bit of work, the transition can seamlessly tie two areas together, enhancing the overall look of your home. This guide will cover all aspects of the process—from why transitioning is crucial to how to choose the best materials for your floors.
Why Transitioning Between Two Wood Floors is Crucial
There are several reasons why transitioning between two wood floors is an essential step in flooring design. The right transition ensures that both functionality and aesthetics are optimized. Here are the main reasons why you should give careful consideration to how to transition between two different wood floors:
Maintaining the Flow and Visual Consistency of a Room
One of the main purposes of transitioning between different wood floors is to maintain a smooth visual flow between spaces. Wood floors, while beautiful, come in various tones and finishes, which can sometimes feel disjointed. A good transition helps to visually blend these floors together, creating a more harmonious and consistent look. This is especially important when you’re transitioning between different rooms or spaces with different wood types. Without a proper transition, you might end up with a stark contrast that can disrupt the look of your home. By carefully planning your transition, you can ensure that your floors complement each other rather than compete for attention.
Ensuring Safety
Safety is another important consideration when transitioning between wood floors. If the transition between two floors isn’t handled properly, it can create uneven surfaces or raised edges, which can become tripping hazards. This is especially concerning in areas with high foot traffic or where children and elderly people may be walking. A poorly installed transition strip may leave a sharp edge that can catch on shoes or cause someone to trip. A smooth and well-planned transition can eliminate these risks, ensuring that your space is both visually appealing and safe for everyone to use.
Preserving the Integrity of Each Floor Type
Every type of wood floor has its own unique characteristics. Different species of wood react differently to temperature and humidity changes, meaning that they expand and contract at varying rates. When transitioning between two different wood floors, it’s essential to consider these natural wood movements. A transition that accommodates wood expansion and contraction will help prevent warping or cracking. This will ensure that each floor maintains its integrity over time and that the transition continues to look great even as environmental conditions change.
Preventing Wear and Tear at the Seam
A high-quality transition can also prevent unnecessary wear and tear at the seam where two floors meet. Without the correct transition, the edges of the flooring may start to fray, become chipped, or even deteriorate over time. The area where two floors meet is often the most vulnerable to damage. By using the right transition materials, you can protect the edges of your floors from unnecessary abrasion and extend the life of both flooring types. This is particularly important in high-traffic areas where the floors will naturally endure more wear.
Key Factors to Consider When Transitioning Between Wood Floors
Transitioning between two different wood floors requires more than just picking out a transition strip. Here are the key factors to consider:
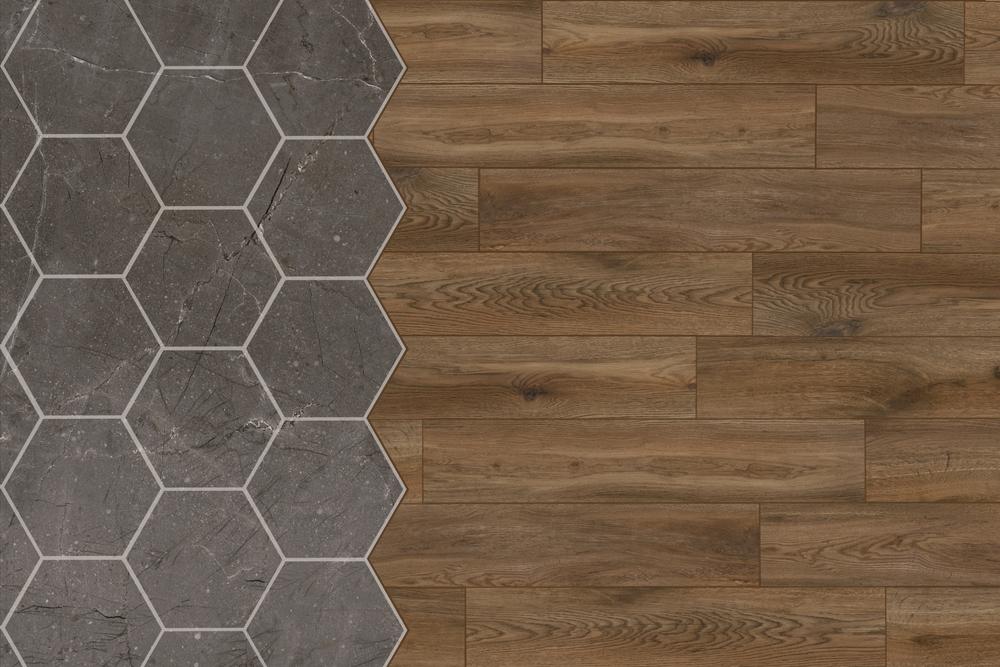
Wood Type & Grain Pattern
Each type of wood has its own grain pattern, color, and texture. When transitioning between two different wood floors, the grain pattern of one floor may not naturally match the other. This is particularly important when the floors are made from different species of wood, such as oak and walnut. Different wood species often have very distinct grain patterns that can either clash or complement one another. Therefore, it’s important to either choose transition pieces that blend the two patterns or pick materials that emphasize their differences in a tasteful way. In some cases, you may even want to use a transition piece that draws attention to the differences between the two floor types, highlighting their individual beauty.
Color & Finish
The color of each floor is another important factor when deciding how to transition between two different wood floors. A smooth, seamless transition is much easier to achieve when both floors are within the same color family. However, contrasting colors can also work if done correctly. For example, a dark wood like walnut transitioning to a lighter wood like maple can make a dramatic statement. But in these cases, it’s essential to pick a transition strip that either complements both colors or makes the change intentional and stylish. The finish is just as important as color. A matte finish next to a glossy one can create an odd contrast, while similar finishes will make the transition look more unified.
Height Difference
If the two wood floors you are working with have different thicknesses, the height difference can create an issue. The floor height difference must be addressed to avoid a noticeable lip or step between the two floors. This is often seen when one floor is hardwood and the other is engineered wood or laminate, as the thicknesses can vary. To solve this problem, transition pieces like reducer strips or threshold transitions are often used. These types of transitions bridge the gap between two floors of different heights, ensuring that the change isn’t jarring or awkward. If the height difference is particularly noticeable, a more pronounced transition strip may be needed to smooth the change.
Room Use and Traffic
Consider how much traffic the area gets. In high-traffic areas, durability and ease of maintenance become more important when selecting transition materials. For example, a hardwood transition may look beautiful but may be prone to scratching in an entryway. In contrast, a more durable material like metal or vinyl might be better suited for areas with constant foot traffic. In lower-traffic areas, you can be a little more flexible with your material choices. Consider how often the floors will need to be cleaned or repaired when making your transition choices. Additionally, if you’re working with a room that has high humidity, like a bathroom, make sure your transition materials are moisture-resistant to prevent warping.
Types of Transitions for Wood Floors
Now that we’ve covered the key factors to consider, let’s take a look at the various types of transition pieces that are available for different wood floor transitions:
Threshold Transitions
Threshold transitions are typically used at doorways or junctions where two different types of wood meet. These transition pieces come in a variety of materials and can help blend the edges of two different floor types seamlessly. They provide a neat finish and are especially effective when transitioning between rooms that require some separation. Threshold transitions are available in several different styles, including standard, beveled, and square-edged, so you can choose one that fits your design needs. They are also available in multiple materials, from wood to metal or rubber, ensuring that they complement both the aesthetic and functionality of the room.
T-Moldings
T-moldings are the best option for areas where the two wood floors are of similar height but have different grain patterns or finishes. These moldings sit flush against both floors and create a clean separation. They are ideal for smaller spaces or doorways where the difference in wood type is more noticeable than the height difference. T-moldings are often used in hallways or doorways, where the transition is not too dramatic but still requires a solution to keep the space looking cohesive. A well-chosen T-molding can make the transition look intentional and carefully planned, rather than jarring.
Reducer Strips
Reducer strips are used when there is a noticeable height difference between the two floors. These transition pieces are typically placed at the junction where the two floors meet and gradually reduce the height difference. Reducer strips are a great option if one floor is significantly higher than the other and you need to create a smooth transition. These strips are available in various materials, including wood, metal, and even rubber, depending on the level of durability and design you’re seeking. A well-installed reducer strip can help ensure that the transition between floors is as smooth and visually appealing as possible.
Flush Transitions
Flush transitions are used when you want the two floors to meet at the same level. These transitions are designed to be level with both floors, creating a smooth, seamless appearance. They are perfect for situations where both floors are at the same height but the material or finish differs. Flush transitions are ideal for modern or minimalist designs where the goal is to create a seamless, continuous flow between different types of wood. They can also help to avoid the need for bulky transition strips, giving your floors a more integrated, cohesive look.
End Cap or Stair Nose
End caps are useful for areas where one floor ends, and the other changes direction or height. They are commonly used when transitioning from hardwood to tile or from a main floor to a stairway. This piece covers the edge of the floor, preventing damage and ensuring a smooth transition. End caps are designed to protect the edge of the floor and maintain a neat, finished look. These transition pieces can also be used in areas where a floor changes direction sharply, like at the base of stairs, providing a professional, polished finish.

Step-by-Step Process for Transitioning Between Two Wood Floors
To help guide you through the process, here’s a step-by-step approach to how to transition between two different wood floors:
Step 1: Prepare the Floor Surfaces
Before you begin installing the transition pieces, make sure the floor surfaces are clean and level. Any debris or dirt will affect the installation of the transition pieces. Additionally, measure the area carefully to determine the proper size of the transition strip you’ll need. Use a vacuum to clean up any dirt or dust, and check for any uneven areas in the subfloor that may require leveling before proceeding.
Step 2: Choose the Right Transition Pieces
Select transition pieces that match the color and design of both floors. Consider using materials like wood, metal, or vinyl for durability and aesthetics. The transition should also be chosen based on the height difference between the two floors. For example, if the two floors are the same height, a T-molding or flush transition might be your best choice. If the height differs, you may need a reducer strip to smooth the change. Don’t forget to consider the finish of the transition piece as well. It should blend seamlessly with the wood floors to avoid any jarring contrasts.
Step 3: Cutting and Fitting the Transition Pieces
Measure the dimensions of the area where the transition piece will go. Use appropriate tools like a saw or utility knife to accurately cut the transition strips. Precise measurements will ensure that the transition strips fit perfectly, without gaps or uneven edges. It’s essential to use the correct tools and cutting techniques to achieve a professional-looking result. For example, when cutting a wood transition piece, a miter saw can help you make clean, straight cuts for a more polished finish.
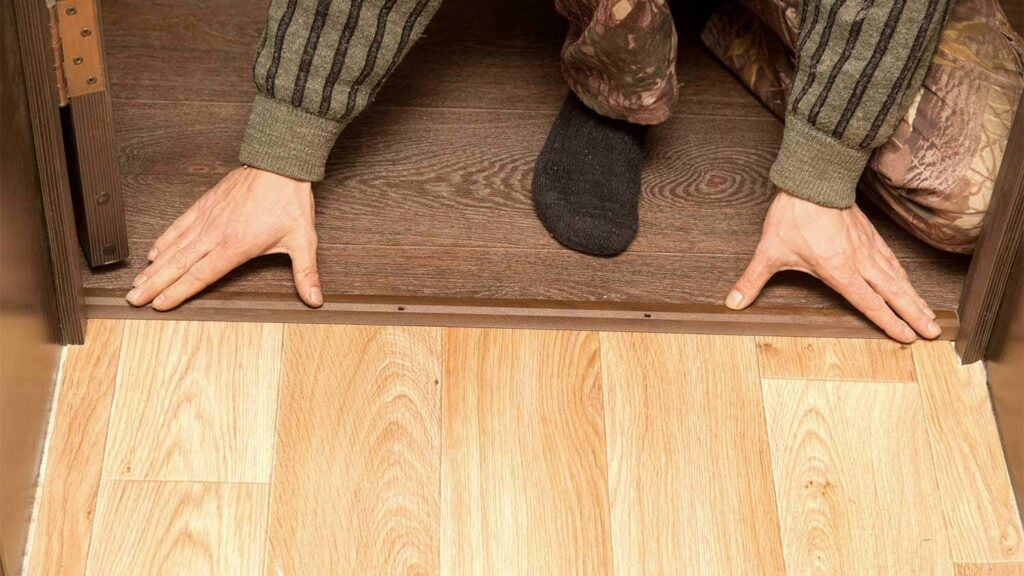
Step 4: Installation
Once you have the transition pieces cut to the proper size, secure them in place using nails or adhesive. Make sure to follow the manufacturer’s instructions for installation. Ensure that there is no gap between the transition pieces and the wood floors to avoid tripping hazards. Use a level to check that the transition strip is sitting flush against the floors. If necessary, apply additional adhesive to ensure that the transition stays in place for long-term durability.
Step 5: Finishing Touches
Finally, finish the installation by sealing or staining the transition pieces to match the wood floors. This will ensure a polished, seamless look. Inspect the transitions one last time to make sure everything is secure and visually appealing. If needed, touch up any areas with stain or sealant to create a cohesive and smooth appearance.
Common Mistakes to Avoid During Wood Floor Transitions
While transitioning between two different wood floors is a manageable task, it’s easy to make some mistakes along the way. Here are some common issues to watch out for:
Mismatched Transition Strips or Incompatible Materials
One of the biggest mistakes is choosing transition strips that don’t complement both wood floors. Be sure to match the materials and color schemes of the transition pieces to create a cohesive look. Mismatched materials can make the transition look sloppy or out of place.
Incorrect Height Adjustments
If the height difference isn’t addressed properly, it can lead to unsightly gaps or uneven surfaces. Always ensure that the transition pieces account for any discrepancies in height. If one floor is much higher than the other, a reducer strip or custom transition piece may be necessary.
Ignoring Wood Expansion or Contraction
Wood floors expand and contract based on humidity and temperature. Failing to account for this can result in buckling or gaps over time. Be sure to leave adequate expansion space when installing transition strips. This will prevent the floors from becoming damaged as they naturally shift.
Poor Placement of Transition Pieces
Improper placement of transition pieces can disrupt the flow of the floor and make the space look disjointed. Plan out where each transition will go before starting the installation. Take time to ensure the pieces are placed correctly, as this will make a big difference in the overall look of the space.
Maintaining Your Wood Floor Transitions
Once your wood floor transitions are installed, it’s important to maintain them for long-term durability. Regular cleaning is essential to keep the area looking fresh. Additionally, inspect the transitions for wear and tear, especially in high-traffic areas. If any issues arise, address them promptly to prevent further damage.
Alternative Transition Ideas for Unique Styles
Transitioning between wood floors can also be an opportunity to get creative with your home’s design. Here are some ideas for unique and stylish transitions:
Contrasting Transitions for Bold Designs
If you want to make a bold statement, consider using contrasting materials for your transition strips. For example, pairing a dark walnut floor with light oak transitions can create a dramatic effect. This approach can make the transition a focal point in the room, adding visual interest and character to the space.
Sleek Modern Transitions
For a contemporary look, use minimalist transition strips that blend seamlessly into the floor. A flush transition with clean lines will complement modern interiors. These types of transitions are subtle and elegant, adding sophistication without overwhelming the space.
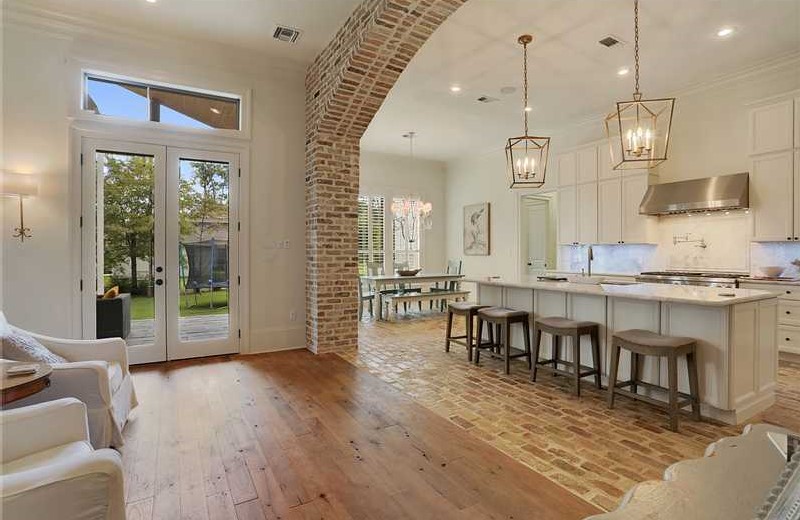
Rustic & Vintage Transitions
Rustic designs often incorporate various wood finishes. A well-chosen transition piece can blend different wood types together while maintaining a cozy, vintage vibe. Consider using distressed or weathered wood for a more aged look, or a transition strip made of reclaimed wood to add charm and warmth to the room.
Professional Help vs. DIY: Which Is Best for Your Project?
While transitioning between two different wood floors is a project that many homeowners can handle themselves, it may be best to hire a professional in certain situations. If your floors have significant height differences or if you are unsure about your ability to cut and install transition pieces, professional help can ensure a flawless finish.
Pros and Cons of DIY
The main advantage of doing the work yourself is cost savings. However, DIY projects can take time and may lead to mistakes if not done properly. If you are confident in your skills, transitioning your floors yourself can be a satisfying and cost-effective solution. But if you’re unsure about your abilities or the complexity of the job, it may be better to leave it to the experts.
When to Hire a Professional
If you want flawless results, hiring a professional may be your best bet. Professionals will have the experience and tools necessary to achieve the perfect transition. They can also help with more complex transitions, such as dealing with large height differences or intricate cuts.
Cost Comparison and Time Investment
When deciding whether to do the work yourself or hire a professional, it’s essential to weigh the costs involved. While hiring a contractor will incur additional labor costs, it might save you time and guarantee a quality finish. On the other hand, tackling the project yourself can be more affordable, but you may need to invest time into learning how to do it properly and obtaining the right tools and materials. It’s also worth considering whether the time you would spend on the project could be better used elsewhere, especially if you’re working on a larger renovation project.
In the long run, if you’re looking for the best results and don’t mind spending extra, hiring a professional could be worth it. However, if you’re on a tighter budget and feel confident in your DIY skills, handling the transition yourself can be a rewarding way to improve your space.
Wrapping Up the Transition Between Two Different Wood Floors
Successfully transitioning between two different wood floors is not only about aesthetics—it also affects the durability, safety, and functionality of the floors. With the right knowledge and tools, this task can be easily completed by homeowners who want to improve their space. Proper planning and attention to detail are crucial to ensure the transition enhances both the look and feel of your home.
Final Tips for Success
- Take your time and plan your transition carefully. Whether you’re handling it yourself or hiring a professional, ensuring everything is measured and cut accurately will give you the best results.
- Pay attention to the materials and finishes you choose. The right transition piece can either enhance or detract from the look of your floors, so it’s important to pick the one that complements both wood types.
- Consider using a variety of transition styles to match different areas of your home. For example, you may want to use T-moldings in doorways but opt for a more subtle flush transition in other areas.
- Remember to maintain your transitions regularly. Keeping them clean and checking for any damage or wear will help preserve the beauty of your floors for years to come.
If you’re unsure about how to transition between two different wood floors or are faced with a challenging installation, consulting a flooring professional can be a great way to ensure a smooth and successful transition.
FAQ Section
How do I fix an uneven wood floor transition?
If you notice an uneven transition between two wood floors, it may be due to an improper height adjustment or poorly fitted transition pieces. To fix this, you can either adjust the height of the transition strip or use a more flexible material, like a reducer strip, to accommodate the difference. Additionally, make sure the subfloor is level before installing the transition to avoid future issues.
Can I transition between wood floors of different thicknesses?
Yes, you can transition between wood floors of different thicknesses. The key is to choose the right transition piece. A reducer strip is typically used when one floor is higher than the other, helping to create a smooth and gradual change in height. For a flawless look, ensure that the transition piece is properly cut and installed, leaving no gaps between the floors.
What should I do if my floors have different expansions due to moisture?
When transitioning between wood floors with different expansion rates due to moisture, it’s essential to leave enough expansion space at the edges of each floor. You may also need to choose transition strips that allow for movement, such as flexible rubber or metal trims, which can accommodate slight shifts in the floor’s position over time.
What is the best transition piece for hardwood and laminate floors?
For hardwood and laminate floors, a T-molding or reducer strip is often the best option, depending on the height difference between the two floors. T-moldings are ideal when the floors are of similar height, while reducer strips work well when there is a noticeable height gap. Both transition pieces will provide a neat, secure finish, ensuring that the different materials blend together smoothly.
Final Thoughts
Knowing how to transition between two different wood floors is an essential skill for anyone looking to update their flooring or enhance their home. With the right approach, the transition between two distinct wood floors can be seamless and visually appealing. Remember to consider the color, material, height, and traffic of the space when making your transition decisions, and always take your time to ensure a quality installation. Whether you’re tackling this project on your own or hiring a professional, the result will be a beautiful and functional floor that enhances the overall look of your home.