
Epoxy resin has become a go-to material for woodworkers due to its versatility and ability to enhance both the aesthetic appeal and durability of wood projects. Whether you’re crafting a custom table, sealing wood for outdoor furniture, or creating beautiful resin art, knowing how to use epoxy resin on wood is an essential skill for achieving stunning, long-lasting results. In this guide, we will walk you through the process, from preparation to finishing, so you can master this technique and elevate your woodworking projects.
What Is Epoxy Resin?
Epoxy resin is a two-part compound that, when mixed together, undergoes a chemical reaction and hardens into a solid, durable, and glossy finish. It is made up of two components: resin and hardener. The resin provides the base material, while the hardener triggers the chemical reaction that cures the resin into a solid state.
Epoxy resin is incredibly popular in woodworking because it forms a tough, protective layer over wood surfaces. It can be used for sealing, coating, and even filling cracks in wood. Whether you’re using clear resin for a glossy finish or a casting resin for repairs, it’s a powerful material for enhancing wood.
Types of Epoxy Resin for Wood
There are several types of epoxy resins available, each suited for different purposes. Let’s take a closer look at the most common options:
- Clear Epoxy Resin: Often used for coating and finishing wood surfaces, clear epoxy resin enhances the natural beauty of wood by creating a high-gloss, glass-like finish. It’s ideal for tables, countertops, and wooden artwork.
- Casting Epoxy Resin: This type is thicker and is often used for filling gaps, cracks, or voids in wood. It’s perfect for those larger repairs that need more volume or thickness.
- Tabletop Epoxy: Specially formulated for surfaces like tabletops, countertops, and bars, this resin is thicker and creates a durable, long-lasting surface that can withstand regular use.
Choosing the right epoxy resin for your project is crucial. The wrong resin can lead to poor adhesion, uneven finishes, or even failure to cure properly.
Why Use Epoxy Resin on Wood?
Epoxy resin offers a host of benefits that make it a top choice for woodworking projects. These include increased durability, protection from moisture, and enhanced appearance. Let’s explore the advantages of using epoxy resin on wood in more detail.
- Enhanced Durability: When applied correctly, epoxy resin forms a tough, scratch-resistant surface. It adds an extra layer of protection that can prevent the wood from becoming damaged over time, especially in high-traffic areas.
- Waterproofing: One of the biggest benefits of epoxy resin is its waterproofing properties. Wood can be prone to warping and rotting if exposed to water for long periods. Epoxy resin provides a protective coating that prevents moisture from seeping into the wood, which is especially valuable for outdoor furniture or kitchen countertops.
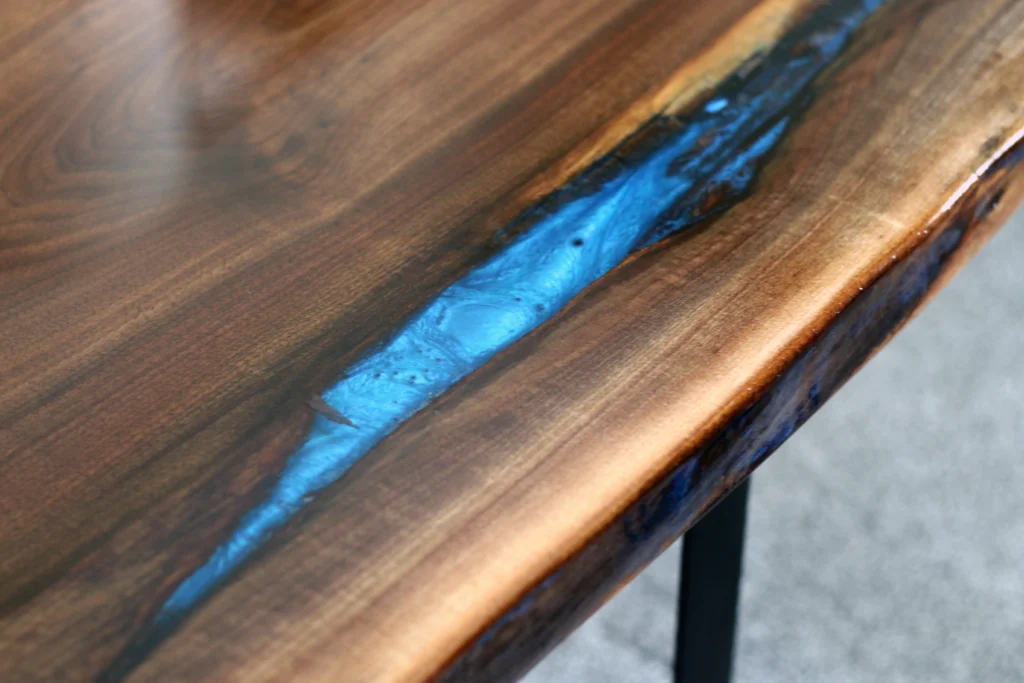
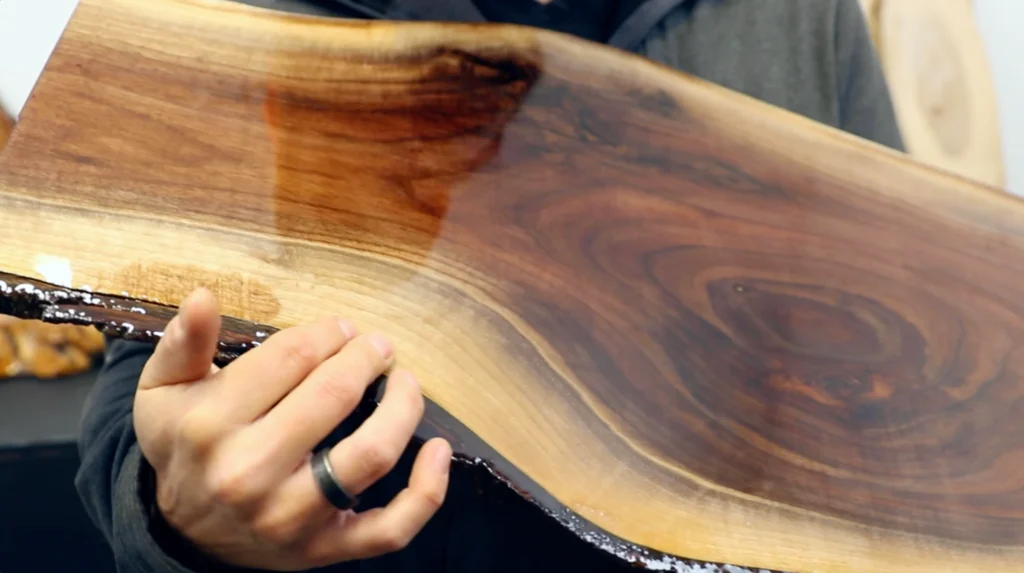
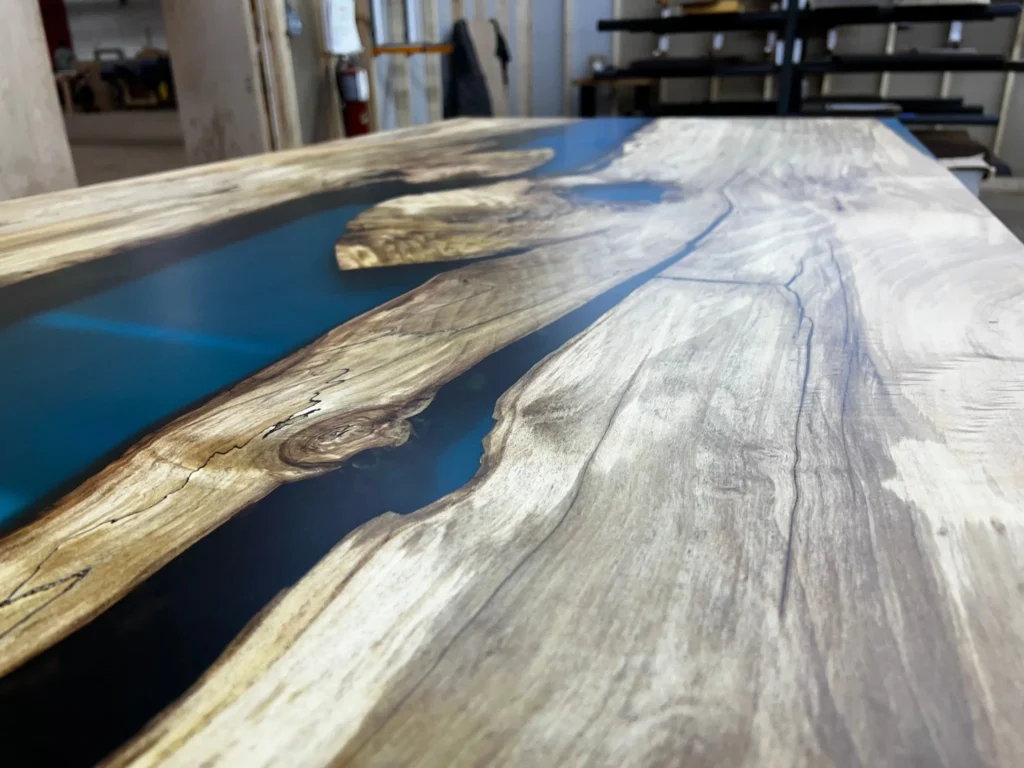
- Aesthetic Appeal: Epoxy resin enhances the natural beauty of wood by highlighting its grain and color. It can also be used to create stunning effects, such as “river tables” where resin is poured between two slabs of wood to create the appearance of flowing water.
- Protection Against Scratches, Stains, and Moisture Damage: The resin layer adds a strong barrier against scratches, stains, and moisture. This makes it an ideal solution for furniture or any other wood surfaces exposed to daily wear and tear.
Whether you’re using epoxy resin for functional or decorative purposes, its unique properties can transform your woodworking projects.
Key Steps for Applying Epoxy Resin on Wood
This table outlines the essential steps to follow when applying epoxy resin on wood. Each step is critical to ensuring a smooth, durable finish that enhances the natural beauty of the wood. Proper surface preparation, correct mixing, and careful application are key factors to achieving a professional-grade result. By understanding each phase of the process, you’ll be able to handle any woodworking project with confidence, whether it’s a small DIY creation or a large furniture piece.
| Step | Description |
| Prepare the Wood Surface | Clean, sand, and check for imperfections like cracks or knots to ensure proper adhesion. |
| Mix the Epoxy Resin | Mix the resin and hardener in the correct ratio to avoid curing issues. Stir thoroughly. |
| Apply the Resin | Pour, brush, or roll the resin evenly onto the wood surface. Use a heat gun to eliminate air bubbles. |
| Smooth and Level | Use a spatula or spreader to create an even coat. Apply multiple layers if needed. |
| Curing and Drying | Allow the resin to cure for 12-72 hours, depending on temperature and humidity, before sanding or reapplying. |
Preparing the Wood for Epoxy Application
Before applying epoxy resin to wood, proper surface preparation is essential to ensure a strong bond and a smooth finish. Here are the steps to prepare your wood:
1. Cleaning the Wood Surface
The first step in preparing your wood surface is to clean it thoroughly. Dust, dirt, oils, and other contaminants can interfere with the resin’s ability to bond to the wood. Start by wiping the wood down with a soft cloth or tack cloth. For more stubborn debris, use a mild soap and water solution, and then dry the surface completely. Ensure that there is no residue left behind that could affect the adhesion of the resin.
2. Sanding the Wood
Sanding the wood is one of the most important steps when preparing it for epoxy resin application. Use medium-grit sandpaper (around 120-150 grit) to lightly scuff the wood’s surface. This helps the resin adhere better. Sanding also helps remove any rough patches or imperfections that could affect the final finish. After sanding, make sure to wipe the wood down again to remove any sanding dust.
If you want an even smoother finish, you can use finer grit sandpaper (around 220 grit) after the epoxy resin has cured, but sanding before application is critical.
3. Checking for Imperfections
After cleaning and sanding, check the wood for any imperfections such as cracks, knots, or holes. If the wood has large cracks or gaps, you can use wood filler to repair them. For smaller cracks, epoxy resin itself can be used to fill them. It’s important to repair any damage before applying the resin to avoid trapping imperfections underneath the finish.
4. Drying and Acclimating the Wood
Ensure that the wood is completely dry before applying epoxy resin. Moisture can interfere with the curing process and affect the final finish. Allow the wood to acclimate to the room’s temperature and humidity. If the wood is too wet or too cold, it can cause issues with adhesion, so always work in a controlled environment.
Choosing the Right Epoxy Resin
When selecting epoxy resin for your project, there are several factors to consider. The resin you choose can affect everything from the ease of application to the final finish of your project.
Factors to Consider
- Viscosity: The viscosity of the resin determines how thick it is. A thicker resin is ideal for filling gaps and cracks, while a thinner resin is better for coating wood surfaces. Choose the viscosity that best fits your project’s needs.
- Curing Time: Some resins cure quickly, while others take longer. Faster-curing resins are perfect if you need to complete a project quickly, but they may be more difficult to work with. Slower-curing resins allow more time for adjustments and are ideal for larger projects.
- UV Resistance: If your project will be exposed to sunlight or outdoor elements, consider choosing a resin with UV inhibitors. This will help prevent yellowing over time and ensure that your piece maintains its clear, glossy finish.
Recommended Brands and Types of Epoxy for Wood
Some reputable epoxy resin brands that are popular among woodworkers include TotalBoat, West System, and ArtResin. Each offers various options designed specifically for woodworking projects, ensuring you get the right resin for your needs.
Tools and Materials Needed for Epoxy Resin Application
To successfully apply epoxy resin to wood, you’ll need the right tools and materials. Here’s a list of what you should gather before you begin:
- Epoxy Resin and Hardener: Choose high-quality resin that is specifically formulated for wood surfaces.
- Mixing Containers and Sticks: Use disposable containers and sticks for mixing the resin and hardener. Make sure they are clean and dry before use.
- Protective Gear: Wear gloves, safety glasses, and a respirator to protect yourself from fumes and skin irritation.
- Brushes, Rollers, or Spreaders: You’ll need tools for applying the resin evenly. Brushes and rollers work well for small projects, while spreaders are better for larger surfaces.
- Heat Gun or Blowtorch: These tools are essential for eliminating air bubbles that may form in the resin during application.
- Drop Cloths or Plastic Sheets: Protect your work area from spills and drips by covering the surrounding area with drop cloths or plastic sheeting.
Having the right tools is key to ensuring that the application process goes smoothly and that you achieve the best results.
Step-by-Step Process for Applying Epoxy Resin to Wood
Now that you’ve gathered your materials and prepared the wood, it’s time to apply the epoxy resin. Follow these steps to achieve a smooth and professional finish:
1. Mixing the Epoxy Resin
Before applying the epoxy, you need to mix the resin and hardener. Most epoxy resins require a 1:1 ratio, but always double-check the manufacturer’s instructions. Use a clean container to mix the two components. Stir the mixture slowly and thoroughly for at least 3-4 minutes, ensuring that both parts are evenly combined. Be careful not to introduce air bubbles during mixing.
2. Preparing the Wood Surface
If necessary, seal the wood with a thin coat of epoxy resin to create a barrier that prevents the wood from soaking up too much resin. This also ensures a smoother surface for subsequent coats. Allow this initial layer to dry completely before applying the full coat of resin.
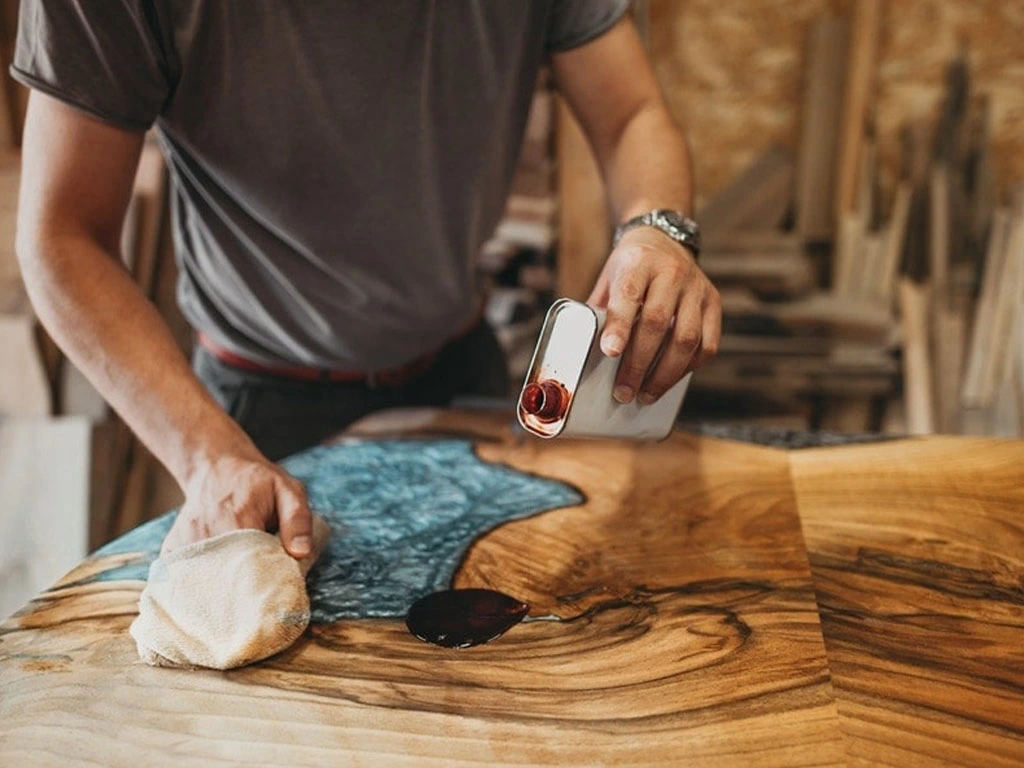
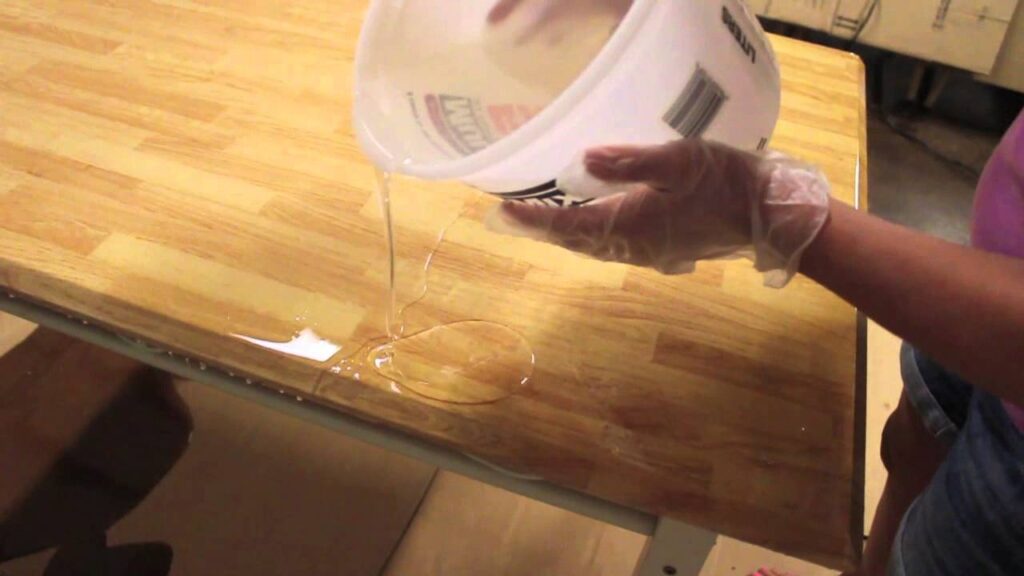
3. Applying the Epoxy Resin
Now, it’s time to apply the resin to the wood. Pour the resin directly onto the surface, starting at one end and working your way to the other. Use a brush, roller, or spreader to spread the resin evenly. Be sure to cover all the exposed wood, especially the edges.
If you’re working with a large surface, you may want to pour the resin in sections to prevent it from hardening too quickly.
4. Dealing with Bubbles
Air bubbles are a common issue when working with epoxy resin. To remove them, use a heat gun or blowtorch held a few inches above the surface. Move the gun or torch slowly over the resin, allowing the heat to pop the bubbles. Be careful not to overheat the resin, as this can cause discoloration.
5. Smoothing and Leveling
After applying the resin, use a spatula or spreader to smooth out the surface and remove any excess. If the resin begins to pool in certain areas, gently move it around to ensure an even coat. For larger projects, multiple layers may be necessary, but be sure to allow each layer to cure before applying the next.
Curing and Drying Epoxy Resin
Proper curing is critical to achieving a solid, long-lasting finish. Curing times vary depending on the type of resin, but most epoxy resins will take between 12 to 72 hours to fully harden.
Curing Conditions
Make sure the room temperature is between 70°F and 80°F for optimal curing. High humidity or extreme temperatures can interfere with the resin’s ability to harden properly.
Signs of Fully Cured Resin
Once the resin has cured, test it by gently pressing on the surface. If the resin feels hard and is no longer tacky, it’s fully cured. You can now proceed with sanding and polishing to achieve a smooth, glossy finish.
Post-Application Care and Maintenance
Once your epoxy resin has fully cured, it’s time to think about how to care for and maintain your project. Proper care will help prolong the life of your resin finish and keep your wooden surfaces looking pristine.
Sanding and Polishing for a Smooth Finish
If you notice any imperfections or rough patches in the epoxy, you can sand the surface after it has fully cured. Start with a fine-grit sandpaper (around 400 grit) to smooth out any bumps, drips, or rough spots. You can gradually increase the grit to 600 or 1000 grit for an ultra-smooth finish.
Once you’ve achieved a smooth surface, you can polish the epoxy resin using a buffing compound or specialized resin polish. This will restore the high-gloss shine and enhance the appearance of the wood underneath. Be sure to follow the manufacturer’s instructions when using polish to avoid damaging the resin.
Regular Cleaning and Care
While epoxy resin is durable and resistant to damage, it’s important to clean it regularly to keep it looking its best. Use a soft cloth and a mild, non-abrasive soap to wipe down the surface. Avoid harsh chemicals, as they can damage the resin or dull the finish.
For larger wood surfaces, such as tables or countertops, be mindful of heavy objects or sharp items that could scratch the resin. Place coasters or placemats under items that may cause damage, especially if the resin has been applied to kitchen or dining furniture.
Touch-Ups and Repairs
Despite its durability, epoxy resin can occasionally suffer from damage, such as scratches or chips. If this happens, you can perform touch-ups by lightly sanding the affected area and applying a fresh layer of resin. This will restore the surface to its original glossy finish.
If the damage is more extensive, you might need to reapply a full layer of resin to the entire surface. Always ensure the surface is clean and dry before reapplying resin to achieve the best results.
Common Issues and Troubleshooting Tips for Epoxy Resin on Wood
Even with careful planning, you might encounter some challenges when working with epoxy resin. This table highlights the most common problems that can arise during the process and offers simple, effective solutions. Understanding these potential issues allows you to troubleshoot efficiently and avoid costly mistakes, ensuring that your epoxy projects come out looking flawless every time. Whether it’s dealing with bubbles or fixing cracks, these tips will guide you through each issue smoothly.
| Issue | Solution |
| Sticky or Soft Resin | Re-sand the sticky spots and reapply a fresh layer of mixed resin, ensuring correct proportions. |
| Cloudy or Hazy Finish | Sand down the affected areas and apply another coat to remove trapped moisture. |
| Bubbles in the Resin | Use a heat gun or blowtorch to carefully pop bubbles as the resin settles. |
| Uneven Application | Apply the resin in thin layers, ensuring even spreading to avoid drips or pooling. |
| Cracks or Chips in Resin | Sand the damaged areas and reapply resin to restore the smooth surface. |
Common Mistakes to Avoid
When working with epoxy resin, a few common mistakes can lead to unsatisfactory results. Let’s take a look at what to avoid to ensure your project turns out perfectly.
1. Inadequate Surface Preparation
One of the biggest mistakes people make is failing to properly prepare the wood surface. If the wood is not clean or properly sanded, the resin won’t adhere properly, leading to peeling or bubbling. Always take the time to clean, sand, and address any imperfections in the wood before applying resin.
2. Incorrect Resin Mixing
Mixing the resin and hardener in the wrong proportions or failing to mix thoroughly can result in an uneven cure. Always follow the manufacturer’s instructions carefully. If you mix the resin and hardener incorrectly, the surface may remain tacky, or the resin may not harden at all.
3. Applying Resin in Unfavorable Conditions
Epoxy resin cures best in controlled environments. Applying resin in high humidity, extremely cold, or very hot conditions can interfere with the curing process. Ideally, work in a room where the temperature is between 70°F and 80°F, and humidity is low. Make sure the wood and resin are at room temperature before applying.
4. Over-Applying Resin
It’s tempting to pour on a thick layer of resin all at once, but over-applying can cause the resin to drip, run, or pool in uneven areas. Instead, apply the resin in thin layers, allowing each layer to cure before applying the next. This method helps prevent uneven finishes and ensures a smooth, durable coat.
Troubleshooting Common Issues
Even if you follow the best practices, problems can occasionally arise during the epoxy resin application process. Below are some common issues you may face, and how to fix them:
1. Sticky or Soft Spots in the Resin
If the resin remains sticky or soft even after curing, it’s often due to improper mixing or an incorrect resin-to-hardener ratio. In such cases, you’ll need to remove the soft spots by sanding them down and reapplying a fresh layer of epoxy resin. Make sure to mix the resin and hardener thoroughly next time to avoid this issue.
2. Cloudy or Hazy Finish
A cloudy or hazy finish can occur if moisture gets trapped in the resin while it’s curing. This can happen when working in high humidity or if the wood wasn’t fully dry before application. To fix this, sand down the affected areas and apply a fresh layer of resin. For larger surfaces, you may need to sand the entire surface and start again.
3. Cracks or Chips in the Resin
Cracks or chips in the resin finish can occur due to improper curing, temperature fluctuations, or physical damage. To fix cracks or chips, sand down the damaged area, clean the surface, and apply a fresh layer of resin to cover the imperfections. It’s important to allow the resin to cure fully before using the piece to prevent further damage.
Creative Ideas for Using Epoxy Resin on Wood
Epoxy resin isn’t just for creating functional, durable finishes—it’s also an excellent medium for artistic expression. Whether you’re working on a DIY project or creating a unique piece of furniture, there are countless creative ways to use epoxy resin on wood. Here are a few ideas to spark your imagination:
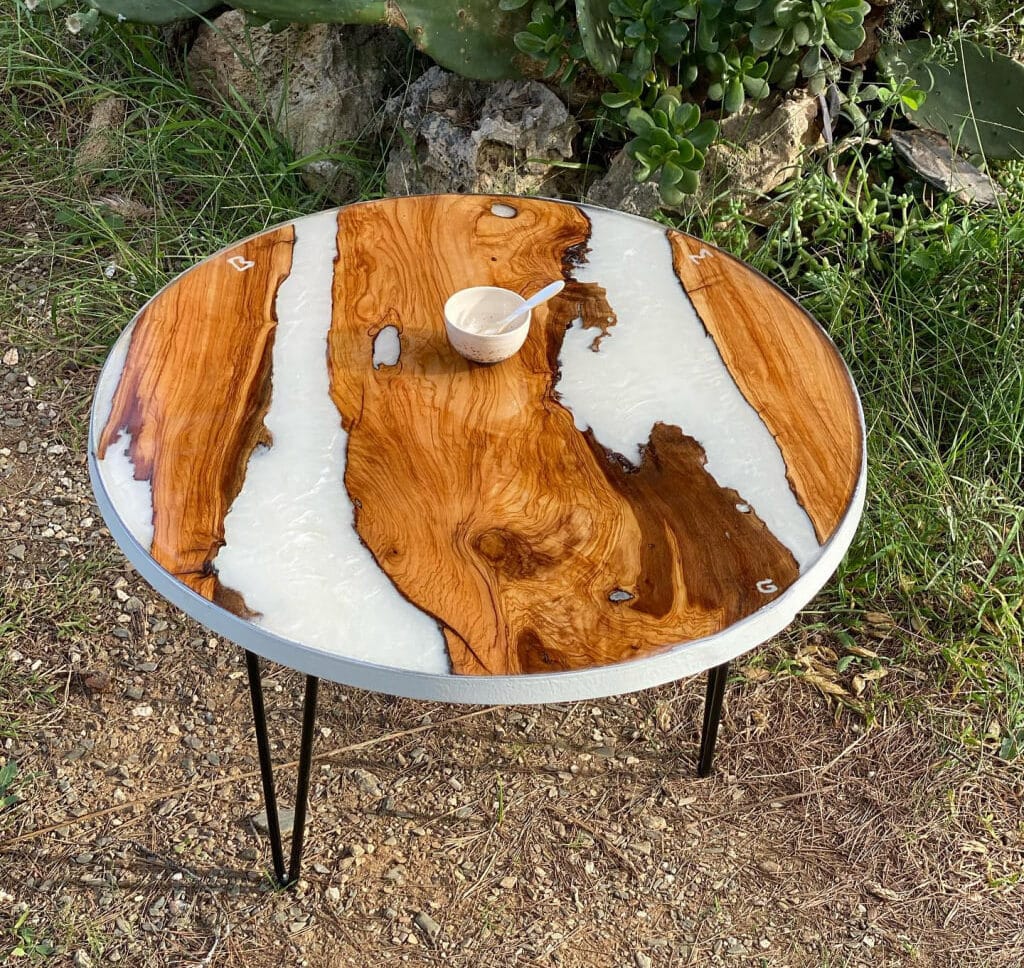
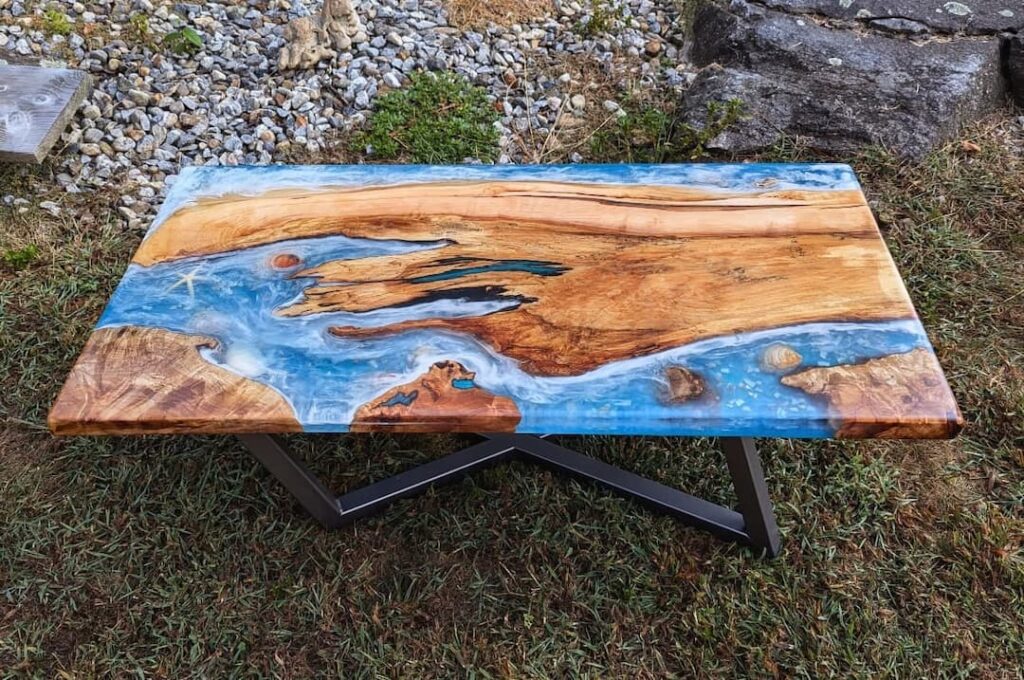
1. Resin River Tables
One of the most popular woodworking projects involving epoxy resin is the “river table.” These tables use epoxy to fill the space between two slabs of wood, often with a colored or translucent resin that creates the appearance of flowing water. You can customize the look by choosing different resin colors or adding decorative elements like stones or glitter to the resin for a unique effect.
2. Wood Art Pieces
Epoxy resin can also be used in artistic wood projects such as resin art panels or wood sculptures. You can create abstract designs, patterns, or even add color and texture to the resin to form intricate art pieces. Incorporating elements like dried flowers, leaves, or metallic pigments will add even more visual interest to your projects.
3. Mixed Media Creations
Epoxy resin is perfect for combining wood with other materials, such as metal, glass, or stone. For example, you can embed stones, coins, or pieces of metal into the resin for an eye-catching effect. By mixing different materials, you can create truly one-of-a-kind pieces that showcase your personal style and creativity.
4. Custom Wood Coasters and Serving Trays
Create functional yet decorative items like coasters or serving trays by applying a layer of epoxy resin over wood surfaces. You can add color, glitter, or even photographs under the resin to personalize these items. They make great gifts or unique additions to your own home.

Wrapping It Up
Mastering how to use epoxy resin on wood opens up a whole world of possibilities for enhancing the appearance and durability of your woodworking projects. Whether you’re working on a small decorative piece or a large functional surface, epoxy resin provides the perfect finish that is both practical and visually stunning.
By following the proper techniques for preparation, application, and care, you can achieve professional-quality results. Don’t be afraid to experiment with different finishes and techniques—epoxy resin is a versatile material that allows for endless creativity and customization.
Start Your Next Project with Confidence
Now that you have all the knowledge and steps needed, it’s time to start your own epoxy resin wood project. Remember to take your time with each step, ensure proper mixing and curing, and always protect your work area and your health. Enjoy the process, and let the natural beauty of wood combined with the sleek finish of epoxy resin create pieces that will last for years to come.
Frequently Asked Questions (FAQs)
How long does epoxy resin take to cure on wood?
Epoxy resin typically takes anywhere from 12 to 72 hours to cure fully, depending on the resin type and environmental conditions. Be sure to check the manufacturer’s recommendations for specific curing times.
Can epoxy resin be used on unfinished wood?
Yes, epoxy resin can be applied to unfinished wood, but it is important to properly seal the wood before application to ensure better adhesion.
Can epoxy resin be sanded and polished after curing?
Yes, once cured, epoxy resin can be sanded and polished to a smooth, glossy finish. You may need to use a polishing compound to restore the high-gloss shine.
What is the best way to apply resin on large wood surfaces?
For large surfaces, pouring the resin is the most efficient method. Use a spreader or brush to evenly distribute the resin, and use a heat gun or blowtorch to remove air bubbles. Make sure to work in smaller sections to prevent the resin from hardening before application.