
Wood engraving, with its centuries-old legacy and finely honed craftsmanship, continues to be an extraordinary form of artistic expression. Rooted in precision and intricacy, this technique allows artists to create stunning designs that capture the essence of their subjects in incredible detail. Whether it’s used for book illustrations, fine art prints, or decorative pieces, wood engraving has proven its resilience in the ever-changing world of art. This comprehensive guide explores every aspect of wood engraving — from its origins to modern-day applications — offering both aspiring artists and seasoned professionals a deeper appreciation for this remarkable art form.
What is Wood Engraving?
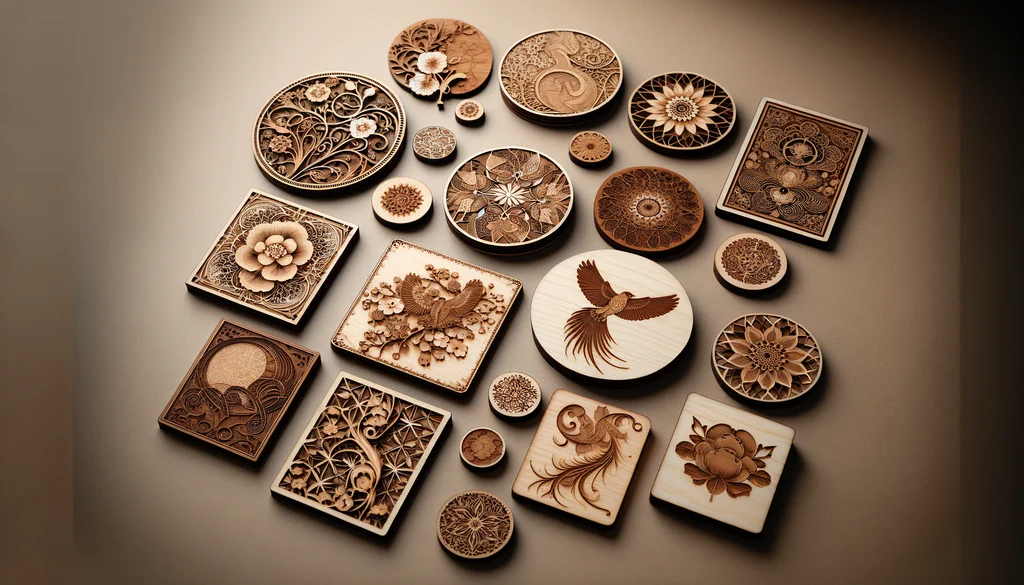
Wood engraving is a form of relief printing where the design is carved into the surface of a block of wood. Unlike woodcut, where the image is carved on the face of the wood, wood engraving typically involves carving into the end-grain of the wood. This technique provides a smoother and finer surface for carving, allowing for greater detail in the final image. The raised portions of the carving are inked, while the recessed areas remain untouched, leaving behind a beautifully detailed print.
Wood engraving is known for its fine lines, intricate textures, and high level of craftsmanship. It differs from other wood-based techniques such as woodcut or wood carving, which often involve bolder, broader strokes. Its precision and ability to capture minute details are what distinguish it as a unique and timeless form of artistic expression.
Throughout history, wood engraving has played an essential role in both the world of fine art and commercial design, especially during the golden age of book illustration. Today, it remains a beloved craft for artists who value handcrafted artistry and refined skill.
The Origins of Wood Engraving: From Ancient Craft to Modern Art
A Brief History of Wood Engraving Across Cultures
The roots of wood engraving extend back to ancient cultures that used wood as a medium for creating images and symbols. Chinese woodblock printing, which emerged during the Tang Dynasty (618–907 CE), is one of the earliest examples of using wood for printmaking. The technique was adopted by various cultures, including Japan, where ukiyo-e prints, made using woodblocks, became famous during the Edo period (1603–1868).
In Europe, the use of woodblocks for illustration dates back to the Middle Ages, where woodcut printing was widely used for religious and decorative purposes. By the time of the Renaissance, woodblock printing had become a fundamental tool for artists and scholars. Wood engraving as a distinct technique emerged during the 18th century in Europe, particularly in England, when artists began to develop more detailed and intricate methods of carving into wood, often on end-grain blocks.
Famous Wood Engravers and Their Impact on the Art World
Among the most influential figures in the history of wood engraving is Thomas Bewick, an English engraver who revolutionized the craft in the late 18th century. Bewick’s innovative techniques in line engraving and his use of fine detail and texture in his works set a new standard for wood engravers. His highly detailed illustrations of animals and nature, particularly in his book «History of British Birds,» became iconic examples of wood engraving and influenced generations of artists and engravers.
In America, Rockwell Kent, an artist renowned for his striking wood engravings, created a unique style that combined bold lines with expressive imagery. Kent’s engravings often depicted nature in a raw, dramatic way, with large-scale landscapes and powerful figures that conveyed the strength and beauty of the natural world. Kent’s influence helped elevate wood engraving as a respected art form during the 20th century.
Other notable wood engravers include Gustave Doré, whose engravings for literary works such as «The Divine Comedy» and «Don Quixote» made a significant impact on the art world, and Eric Gill, a British artist who produced beautifully crafted wood engravings for a variety of artistic and commercial uses. These engravers and many others have helped shape the wood engraving tradition, blending artistry and technical skill to create lasting works of art.
How Does Wood Engraving Work? Understanding the Process
Step-by-Step Breakdown of How Wood Engraving is Done
The process of wood engraving requires several carefully executed steps to ensure that the final print is both precise and visually compelling. Here’s a detailed breakdown of each step involved:
- Selecting the Wood: The first step in wood engraving is choosing the right piece of wood. The wood should be end-grain, as it provides a smooth, consistent surface for carving. Boxwood, cherry, and maple are among the most popular choices because of their fine grain and durability. End-grain wood allows for sharper and more detailed engravings compared to edge-grain wood, which is more difficult to carve due to the uneven texture.
- Designing the Image: The artist either sketches their design directly onto the wood or transfers it from a separate drawing. The design must be thought out carefully because the artist will need to carve away portions of the wood to create the final image. Fine details are key in wood engraving, so the design should be simple yet adaptable to the carving process.
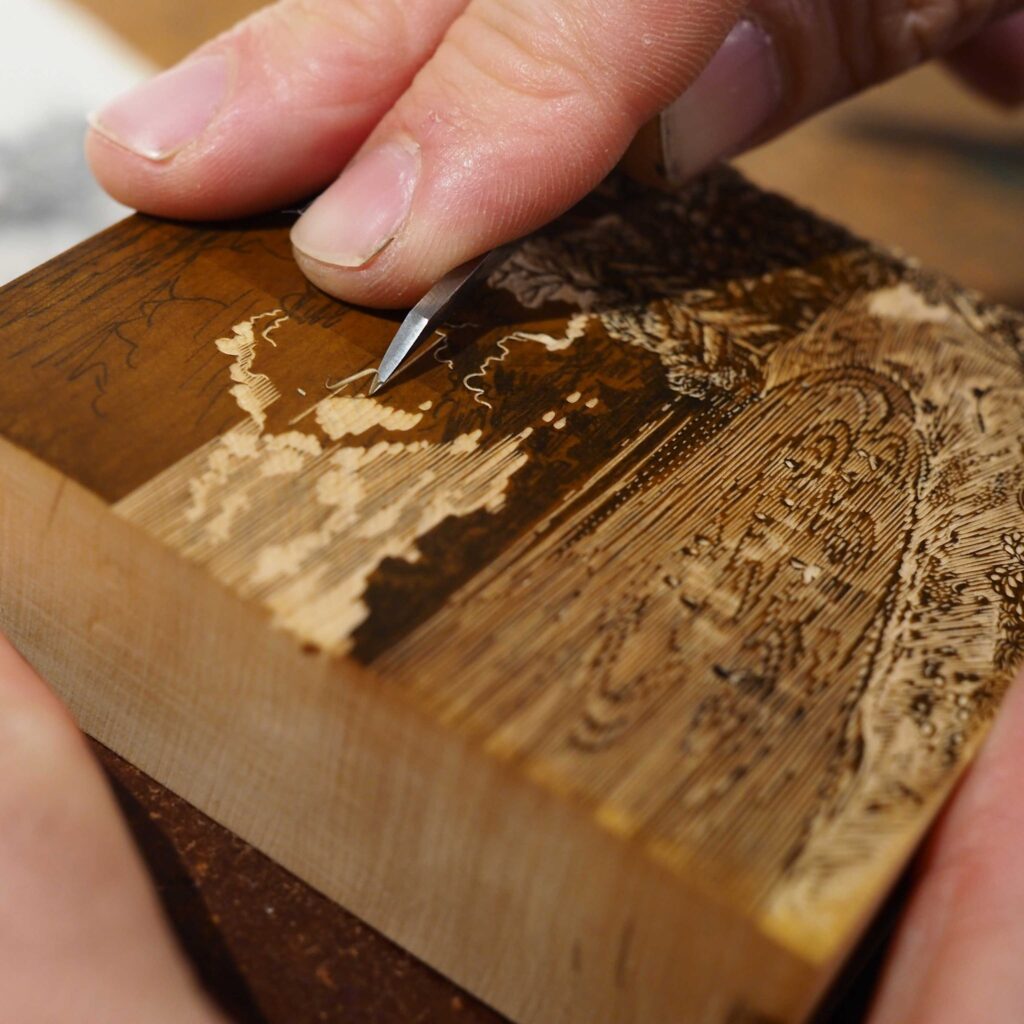
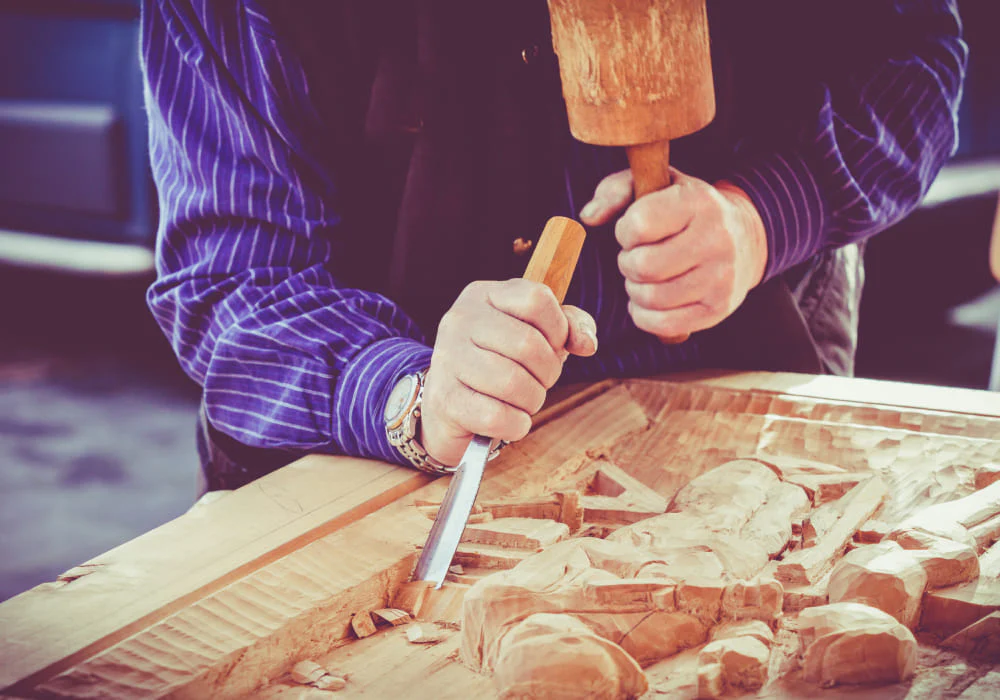
- Carving the Wood: Once the design is on the wood, the artist begins carving using specialized tools. The engraving is done by removing the areas that will not be inked. The lines that remain raised will form the final image when printed. Small, sharp knives, gouges, and chisels are used to achieve different effects, from fine lines to broader, deeper textures. The level of precision is vital; a slight misstep can ruin the entire design.
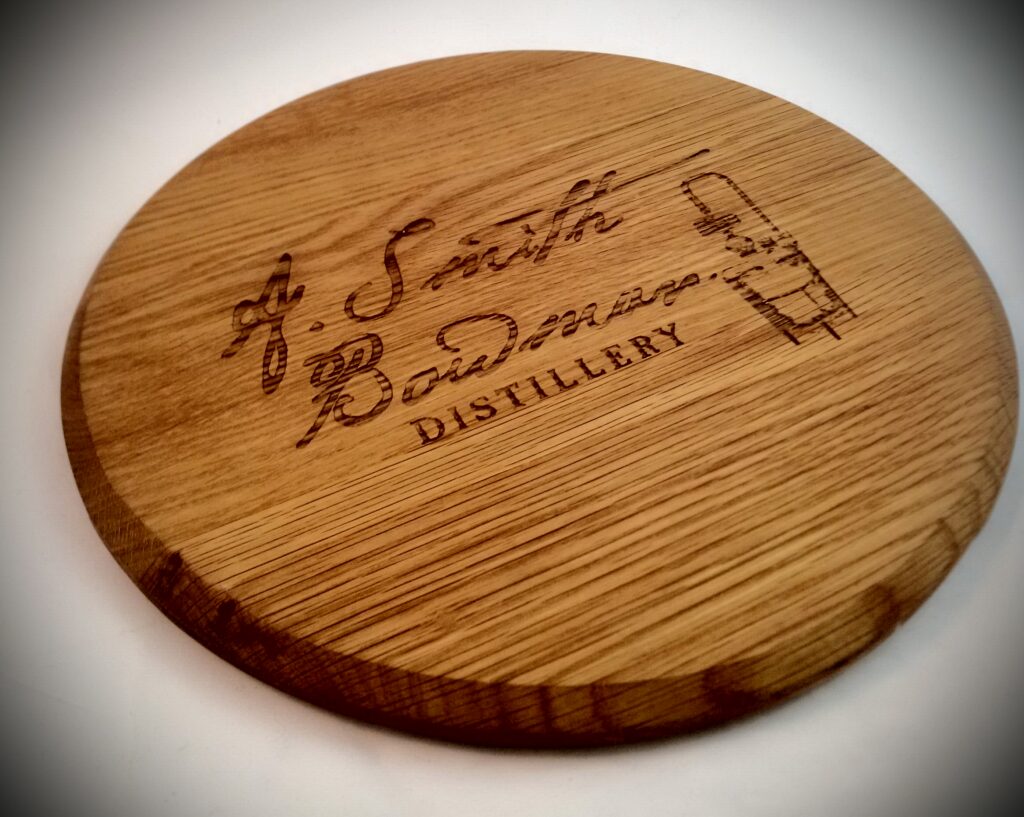
- Inking the Block: After the carving is complete, the woodblock is carefully inked. Ink is rolled over the raised parts of the engraving, leaving the carved-out sections free of ink. The type of ink used depends on the desired result; traditional oil-based inks provide a rich, deep finish, while water-based inks may yield a lighter, subtler effect.
- Transferring the Image: Finally, the inked block is placed on paper or another surface. The block is either pressed by hand or with a printing press, transferring the ink from the raised areas to the paper. The pressure must be just right to ensure that the print is clear and even without smudging or distortion.
Tools of the Trade: Carving Tools, Wood Types, and Techniques
The tools used in wood engraving are specialized to allow for the greatest degree of precision and control. Each tool has a specific purpose, and understanding how and when to use them is critical to mastering the craft.
- Engraving Knives: These are the primary tools used to carve lines into the wood. Knives with fine, sharp blades allow the artist to create fine details and delicate textures. They come in various shapes, including straight-edged knives for fine lines and curved knives for more intricate carvings.
- Gouges: Gouges are used to remove larger sections of wood and shape the design. They are available in a variety of profiles, including U-shaped gouges for curved cuts and V-shaped gouges for finer lines. The gouge is an essential tool for creating texture and depth in the engraving.
- Chisels: Chisels are similar to gouges but with a flat blade. They are often used for wider cuts or to clean up edges. Chisels can also help define sharp lines and transitions in the design.
- Burnishing Tools: These tools are used to apply pressure to the paper during the printing process, ensuring that the ink transfers clearly and evenly from the raised wood to the paper.
The type of wood chosen for engraving is crucial in determining the quality of the final print. As mentioned earlier, end-grain wood is preferred because it allows for finer and more detailed work. Softwoods like pine may be easier to carve but do not offer the same level of detail, while hardwoods like boxwood are denser and more suited for intricate work.
The Role of Precision and Detail in Wood Engraving
The beauty of wood engraving lies in its meticulous nature. Every line, every curve, and every texture is the result of careful planning and precise execution. Because the raised areas of the wood are inked while the recessed sections are left blank, the artist must pay close attention to the depth of the cuts to achieve the right amount of contrast and detail.
Wood engraving requires an exceptional level of control over the carving tools. Artists must develop a steady hand and an acute sense of how much pressure to apply. The precision needed to create sharp, clean lines requires both skill and patience, making wood engraving one of the more challenging techniques in the world of printmaking.
Types of Wood for Engraving: Choosing the Right Wood
Best Types of Wood for Engraving (End-Grain vs. Edge-Grain)
The type of wood used for engraving has a direct impact on the final print. Woodworkers and engravers typically prefer end-grain wood for its fine texture and ability to take sharp, precise carvings. The end-grain of the wood is where the fibers are aligned perpendicular to the surface, making it smoother and more resistant to splintering when carved.
Boxwood is one of the most sought-after types of wood for engraving due to its fine grain, dense texture, and durability. Other popular choices include cherry and maple, both of which offer a smooth surface for carving. While edge-grain wood is often used for larger projects, it is more difficult to carve accurately, and the results are typically rougher and less detailed than those achieved with end-grain wood.
Why Wood Quality Matters in Achieving Intricate Details
The quality of the wood is crucial in ensuring that the engraving retains fine details. Higher-quality woods have a consistent, tight grain, which allows for cleaner cuts and sharper lines. Wood with gaps, cracks, or imperfections can make engraving difficult, as the tools may catch on uneven surfaces or the ink may transfer unevenly. By selecting high-quality wood, engravers ensure that the final print captures every fine detail with clarity.
How the Quality of Wood Affects the Final Result
The better the quality of the wood, the more fine detail the engraver can achieve. For instance, boxwood provides a smooth, even surface that takes fine lines exceptionally well, allowing engravers to create extremely detailed images. This is why boxwood is often the wood of choice for highly detailed engravings like portraits, fine textures, and intricate patterns.
The Tools of Wood Engraving: Essential Gear for Beginners and Pros
Engraving Tools: Knives, Gouges, and Chisels Explained
For any aspiring wood engraver, understanding the tools of the trade is essential. Here’s an overview of the most commonly used tools:
- Knives: These are used for carving fine lines and delicate details. They come in different shapes, including straight blades for carving sharp, clean lines and curved blades for creating softer, flowing lines.
- Gouges: Gouges are larger tools designed for removing wood more quickly. The V-shaped gouge is particularly useful for creating precise cuts and intricate textures.
- Chisels: Chisels are broader and flatter, often used for removing larger chunks of wood or for creating sharp, clean edges in the design.
- Burnishers: Used to apply even pressure to the print during the inking process, ensuring a crisp, clear print.
How to Select the Right Tools for Different Projects
Choosing the right tool depends on the style and complexity of the engraving. For detailed line work, fine engraving knives are essential, whereas larger projects might require broader tools like gouges and chisels. If the artist is creating a high-contrast design, they might opt for a deep V-gouge to carve out dramatic lines and texture. When selecting tools, beginners should invest in quality sets that offer versatility across various techniques.
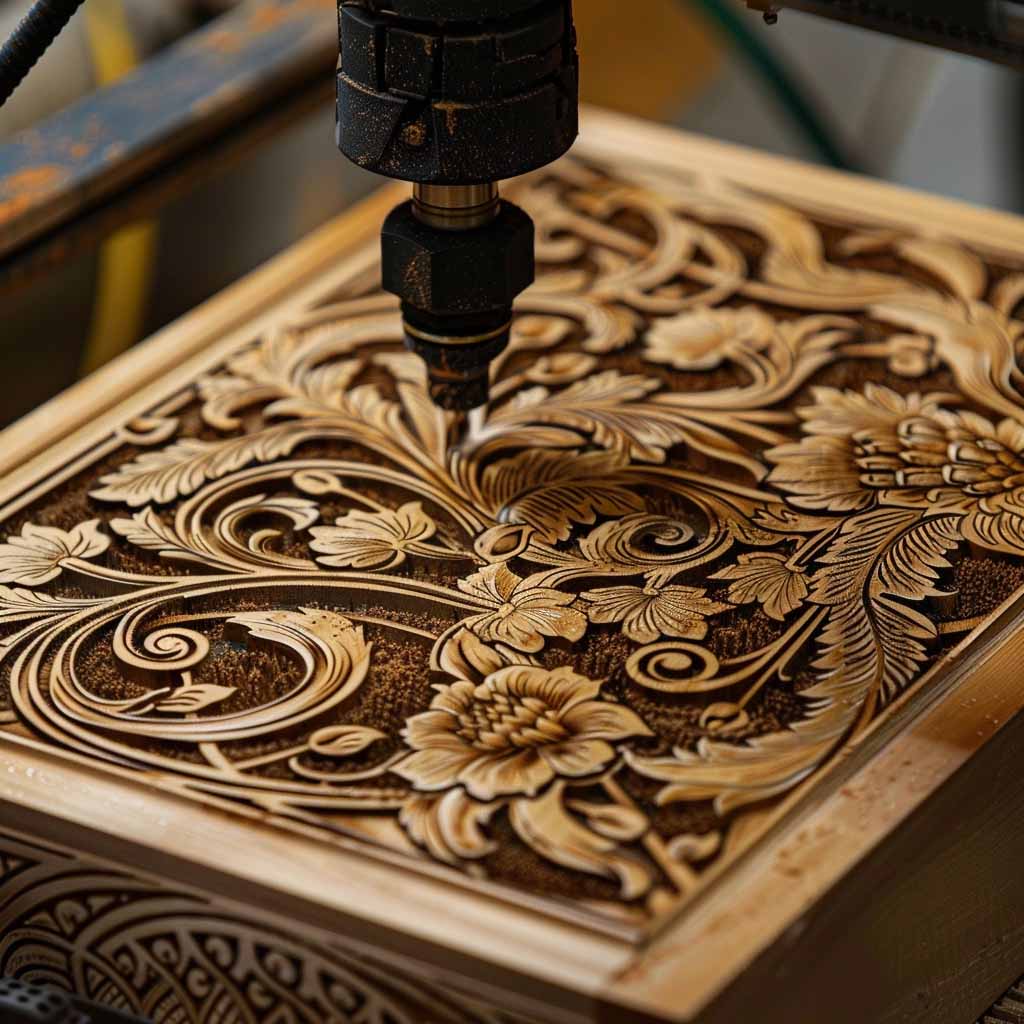
Digital vs. Traditional Wood Engraving Tools
In the modern age, digital engraving tools and laser cutters have begun to influence the craft of wood engraving. Digital tools allow for faster, more efficient engraving with high precision, but they lack the tactile, hands-on quality that traditional engraving offers. Traditional tools, such as manual knives and gouges, allow for more personal expression and are ideal for those who wish to keep the process rooted in manual artistry.
Mastering Wood Engraving Techniques: Tips and Tricks for Success
How to Create Fine Lines, Textures, and Shading
The ability to create fine lines, textures, and effective shading is what separates a novice wood engraver from a master. Here are some tips for improving these elements:
- Fine Lines: Use a sharp, small engraving knife and apply light pressure to carve intricate, delicate lines. Work slowly and methodically to achieve clean, consistent lines.
- Textures: Vary the pressure and direction of your carving tools to create different textures. For example, deeper cuts can create darker tones, while shallower cuts create lighter areas. Experiment with different tools to achieve a range of effects.
- Shading: Wood engraving relies heavily on shading to create depth and dimension. Carve different areas of the design at varying depths to achieve a gradual transition from light to dark. The more deeply you carve, the darker the print will be.
The Importance of Depth and Contrast in Wood Engraving
The manipulation of depth is critical in wood engraving. Deeper cuts will hold more ink, resulting in darker areas in the print, while shallow cuts will appear lighter. By varying the depth across the engraving, you can create rich contrasts between light and dark, adding volume and dramatic effects to the design. When done correctly, this contrast brings the engraving to life and adds a sense of dimension to the print.
Understanding Light and Shadow Effects in Engravings
Light and shadow play a vital role in wood engraving, as they create depth, dimension, and visual interest. To master the interplay of light and shadow, you must be conscious of the direction of light in your design and how the cuts interact with this light source. The raised areas of the engraving will catch more ink and, as a result, create darker, shadowed parts of the print. Conversely, the recessed areas will remain lighter, highlighting the intricate details of the image. By using light and shadow effectively, you can produce more dynamic, three-dimensional engravings that feel alive and engaging.
Wood Engraving vs. Wood Carving: What’s the Difference?
Distinguishing Engraving from Carving Techniques
While wood engraving and wood carving share the same basic medium wood — the techniques and results differ significantly. Wood carving involves removing large chunks of wood to create a three-dimensional object or a relief image, often with broader, more exaggerated features. Carving typically focuses on larger shapes and figures, giving the artist more freedom to explore form and structure.
On the other hand, wood engraving is a form of relief printing where the artist carves fine, intricate designs into a flat surface. Engraving requires more attention to detail and precision since the goal is to produce an image that is flat, with the raised parts creating a print when inked.
The key distinction between these two techniques lies in their approach to the material. Carving is usually more freeform and expressive, while engraving is focused on creating highly detailed, precise, and often delicate prints. Both techniques can complement one another, but they serve different purposes in the art world.
How the Two Styles Complement Each Other in Artistic Expression
While wood engraving and wood carving differ in their methods and end products, they often work together harmoniously. For instance, a wood engraver may use carving techniques to achieve more organic shapes and textured effects in their designs. Conversely, a wood carver might incorporate engraving for fine detailing in their works. Together, these two crafts offer artists a wide array of possibilities for self-expression, blending bold shapes with delicate lines and highly detailed elements.
Wood Engraving for Beginners: Getting Started with Your First Project
Easy Project Ideas for Novice Engravers
Starting out in wood engraving may seem intimidating, but with the right approach, anyone can begin to experiment and learn the craft. For beginners, simple projects are a great way to get a feel for the tools and techniques involved. Here are some ideas:
- Basic Geometric Patterns: Start by carving simple shapes like squares, circles, and triangles. These shapes will help you become familiar with the carving process and develop a steady hand.
- Nature Motifs: Engraving leaves, trees, or flowers allows you to practice creating fine lines and textures without becoming overwhelmed by complexity.
- Silhouettes: Create silhouettes of simple objects like animals or people. This project will help you learn how to work with positive and negative space in your engravings.
Step-by-Step Guide to Starting Your First Wood Engraving
- Choose Your Wood: Start with end-grain wood like boxwood or maple for the best results.
- Sketch Your Design: Lightly sketch your design onto the wood, using a pencil. Keep it simple, with a focus on clear, bold lines and shapes.
- Select Your Tools: Begin with a few basic tools: a small knife for carving fine lines, a gouge for broader areas, and a chisel for cleaning up edges.
- Start Carving: Work slowly and carefully, focusing on achieving precision with each cut. Remember to carve away from your body and hands to avoid accidents.
- Ink the Block: Once you’re happy with the engraving, roll ink over the raised portions of the wood, ensuring the ink is evenly distributed.
- Transfer the Print: Place a sheet of paper on top of the inked block and apply pressure to transfer the image.
With each step, your skill and confidence will grow, leading to more complex and sophisticated projects as you advance.

Advanced Wood Engraving Techniques: Pushing the Boundaries of the Art
Exploring Complex Engraving Styles and Patterns
Once you’ve mastered the basics, you can explore more complex engraving styles that incorporate advanced techniques. These might include multi-layered engravings, where the artist carves multiple blocks to create a series of prints that are layered on top of each other. This can produce depth and texture that would be impossible to achieve in a single-layer engraving.
Another advanced technique is combining engraving with other mediums. For example, some artists combine wood engraving with etching or lithography to create hybrid prints that merge different textures and styles. These projects challenge the engraver to think creatively and experiment with combining traditional techniques with modern innovations.
Multi-Layered Engraving and Experimenting with Textures
One of the most exciting aspects of advanced wood engraving is the ability to experiment with texture and depth. Multi-layered engravings allow the artist to build up various textures, creating a richer, more intricate final print. For example, by carving a background layer first, then adding progressively finer details on subsequent layers, the artist can build up a three-dimensional effect that adds complexity to the final print.
Experimenting with textures is another way to push the boundaries of the art. By varying the depth of your cuts, you can create a variety of different effects — from smooth, flowing lines to rough, textured surfaces that contrast beautifully in the print.
Wood Engraving in Modern Art: How Contemporary Artists Are Using It
Examples of Modern Wood Engraving in Art and Design
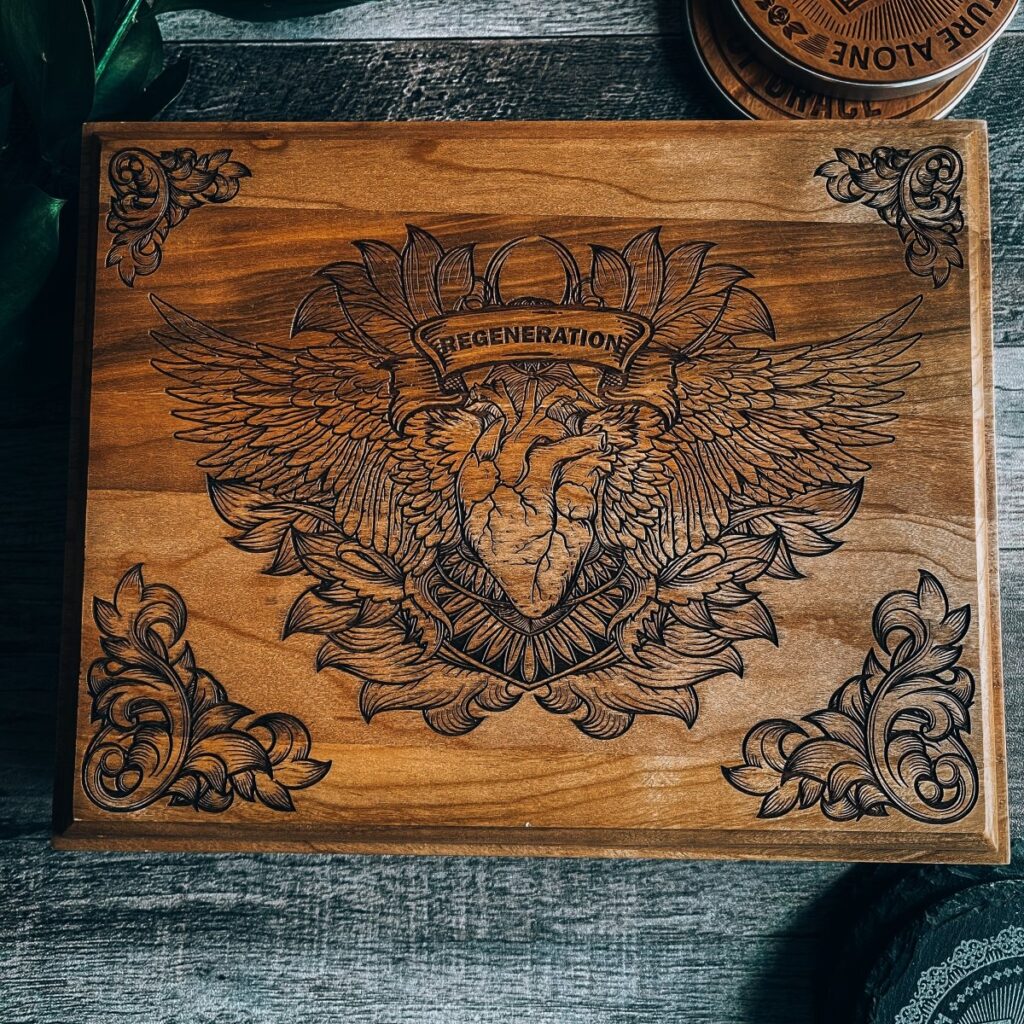
While wood engraving has deep historical roots, it remains a vibrant and evolving art form today. Contemporary artists are continuously pushing the boundaries of this medium, using it to create both traditional and innovative works. Some modern wood engravers focus on updating classic themes, such as nature, animals, and portraiture, while others explore abstract designs or social commentary through the medium.
One notable contemporary artist, Barry Moser, has revitalized wood engraving for the modern era with his intricate book illustrations and prints. His work emphasizes the beauty and precision of wood engraving while addressing contemporary themes through the lens of this timeless medium.
How Technology Is Influencing Wood Engraving Today
The advent of technology has also influenced the field of wood engraving. Laser engraving machines and digital tools now allow for precise and intricate designs that can be reproduced quickly and accurately. Some artists are embracing these technological innovations, while others continue to honor traditional, hands-on techniques. The combination of traditional engraving and new technologies opens up exciting new possibilities for contemporary wood engravers.
Wood Engraving in Printmaking: The Art of Creating Stunning Prints
The Process of Transferring Wood Engravings to Paper
Creating a print from a wood engraving involves transferring the design from the block onto paper using ink and pressure. This is done by rolling ink onto the raised portions of the engraving and pressing the block against a piece of paper. The key to achieving a clear, crisp print is applying the right amount of pressure without over-pressing, which could distort the image.
The process of transferring the engraving to paper requires both finesse and patience. The paper used must be thick and absorbent enough to hold the ink and produce a clean, crisp image. Hand presses are often used in traditional wood engraving, though modern machines can achieve a more consistent result.
The Role of Wood Engraving in the History of Printmaking
Wood engraving played a central role in the development of printmaking, especially in the 19th century when it became one of the dominant methods for creating book illustrations. Before the advent of photography, wood engravings were often used to depict portraits, landscapes, and scenes from daily life in printed books and newspapers. Wood engravings were particularly useful in this regard because of their ability to reproduce fine detail, making them ideal for illustrated publications.
Despite the rise of modern printing technologies, wood engraving continues to hold a significant place in the history of printmaking. The unique aesthetic qualities of engraved prints — the crispness of the lines, the depth of the shading, and the rich texture — cannot be easily replicated by modern methods.
Preserving Your Wood Engraving: Tips for Longevity and Care
How to Protect and Frame Your Wood Engravings
Wood engravings are works of art that require proper care to ensure their longevity. Framing them under glass protects the prints from dust, moisture, and light exposure. It is crucial to use acid-free materials when framing to avoid damage to the paper and the ink. Additionally, keeping the engraving in a temperature-controlled environment will help prevent the wood from warping or cracking over time.
Best Practices for Storing and Displaying Finished Pieces
When not displayed, store your wood engravings flat in a protective portfolio or acid-free folder to prevent bending or exposure to light. If storing multiple prints, ensure they are not stacked too tightly, as this can cause pressure marks or damage.
To maintain the quality of the print, avoid hanging the artwork in direct sunlight or in damp environments. Proper care will help preserve the fine lines and textures of the engraving for generations to come.
Where to Learn Wood Engraving: Resources and Communities
Recommended Books, Online Courses, and Workshops for Learning
For those eager to learn wood engraving, there are a wealth of resources available. Books such as «The Art of Wood Engraving» by Keith M. H. Simpson and «The Engraver’s Handbook» provide comprehensive guides to the craft. Additionally, online platforms such as Skillshare and Udemy offer wood engraving courses for beginners and advanced practitioners alike.
Local art schools and community centers often offer workshops where aspiring engravers can learn from experienced instructors. Many of these workshops provide the opportunity to work with professionals, giving students hands-on experience and direct feedback on their technique.
Joining Wood Engraving Communities and Finding Mentors
Engraving communities, both online and in person, are excellent places for learning and sharing techniques. Forums, social media groups, and professional organizations provide opportunities for engravers to connect, share tips, and showcase their work. Mentorship from experienced artists is invaluable, offering a chance to learn from their expertise and receive constructive feedback.
Conclusion: Embrace the Art of Wood Engraving
Wood engraving, with its centuries-old tradition and remarkable precision, remains an essential and respected medium in the world of fine art. Whether you are a beginner just starting or an experienced engraver pushing the boundaries of the craft, this timeless technique offers endless possibilities for expression, creativity, and artistic growth. With the right tools, practice, and dedication, you too can create beautiful and intricate engravings that carry forward the legacy of this extraordinary art form.
So, embrace the art of wood engraving, experiment with your designs, and discover the satisfaction of creating something truly unique with nothing but your hands, your tools, and your imagination.